主机清单:172.16.0.30  四核4G 80G硬盘
主机名:devops-1
系统:centos7.6
1.创建一个目录
[root@devops-1 ~]# mkdir -p /usr/local/docker/gitlab_docker
2.查看gitlab的镜像
[root@devops-1 ~]# docker search gitlab
返回结果
NAME                                     DESCRIPTION                                     STARS     OFFICIAL
gitlab/gitlab-ce                                                                    35                   。。。。。。。。。。。。。。。。。。。。。。。。。
下面还有很多
3.下载gitlab容器
[root@devops-1 ~]# docker pull gitlab/gitlab-ce
Using default tag: latest
latest: Pulling from gitlab/gitlab-ce
44ba2882f8eb: Pull complete
7a9eb068f386: Pull complete
70f96f3d9872: Pull complete
fe791db2df4b: Pull complete
52544e0b97b8: Pull complete
7af018d9cd9e: Pull complete
85d7ed6dd13a: Pull complete
6e35d608ff70: Pull complete
Digest: sha256:490be1fd2c1bfabc01b35f395fe53dd604fe5f7f140983bc75f67b16609269df
Status: Downloaded newer image for gitlab/gitlab-ce:latest
docker.io/gitlab/gitlab-ce:latest
4.进入到/usr/local/docker/gitlab_docker目录里创建一个docker-compoer.yml文件
[root@devops-1 ~]# vim /usr/local/docker/gitlab_docker/docker-compose.yml
#写入已下内容
version: '3.1'
services:
  gitlab:
     image: 'gitlab/gitlab-ce:latest'
     container_name: gitlab
     restart: always
     environment:
        GITLAB_OMNIBUS_CONFIG: |
           external_url 'http://172.16.0.30:8929'
           gitlab_rails['gitlab_shell_ssh_port'] = 2224
     ports:
        - '8929:8929'
        - '2224:2224'
     volumes:
        - './config:/etc/gitlab'
        - './logs:/var/log/gitlab'
        - './data:/var/opt/gitlab'
###解释:
external_url 'http://172.16.0.30:8929'
	这里的IP地址要改成你宿主机的IP地址,比如我这台主机的IP地址是172.16.0.30
5.启动容器
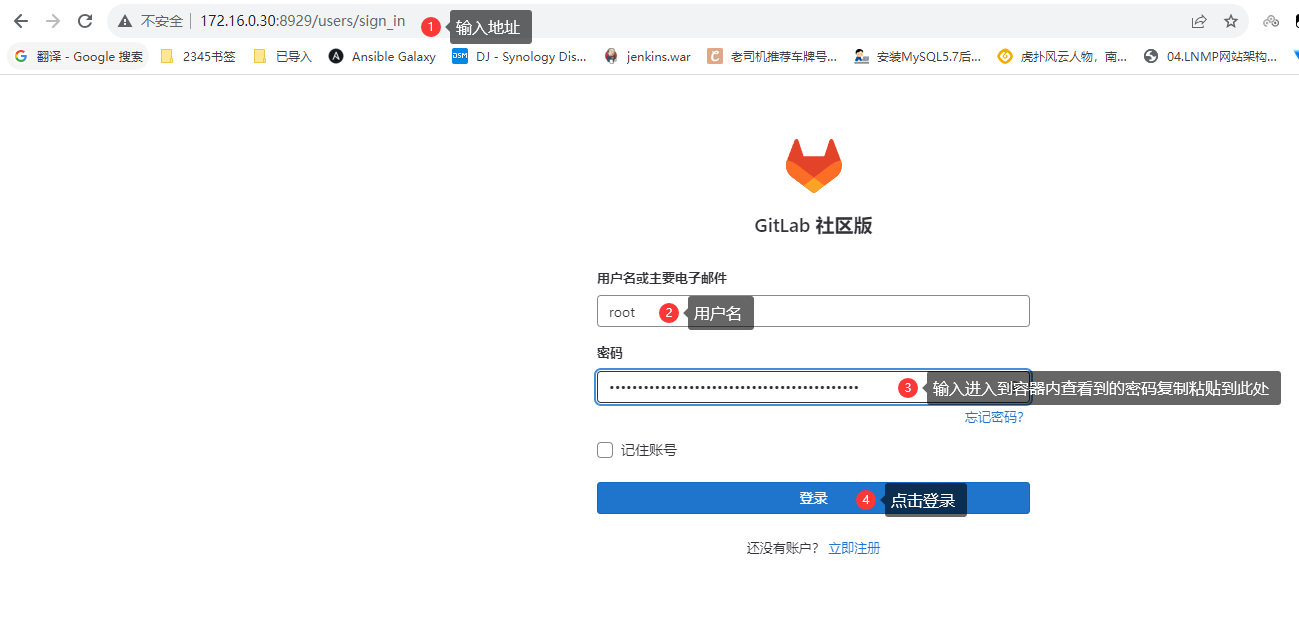
1.先进入/usr/local/docker/gitlab_docker/目录下
[root@devops-1 ~]# cd /usr/local/docker/gitlab_docker/

2.启动容器(根据配置启动的时间不定)如果出现5xx这类错误等等就好了
[root@devops-1 gitlab_docker]# docker-compose up -d
返回结果:
Creating network "gitlab_docker_default" with the default driver
Creating gitlab ... done

3.查看日志命令
[root@devops-1 gitlab_docker]# docker-compose logs -f

4.查看giglab密码
进入容器
[root@devops-1 gitlab_docker]# docker exec -it gitlab bash

查看密码
root@d8877b664b22:/# cat /etc/gitlab/initial_root_password
# WARNING: This value is valid only in the following conditions
#          1. If provided manually (either via `GITLAB_ROOT_PASSWORD` environment variable or via `gitlab_rails['initial_root_password']` setting in `gitlab.rb`, it was provided before database was seeded for the first time (usually, the first reconfigure run).
#          2. Password hasn't been changed manually, either via UI or via command line.
#
#          If the password shown here doesn't work, you must reset the admin password following https://docs.gitlab.com/ee/security/reset_user_password.html#reset-your-root-password.

Password: GJLxLprIb6Ph4E4aqzPYxXlhndZhEpOq1t7NkSVSfHI=

# NOTE: This file will be automatically deleted in the first reconfigure run after 24 hours.

密码是Password:后面的是密码 GJLxLprIb6Ph4E4aqzPYxXlhndZhEpOq1t7NkSVSfHI=

5.退出容器
root@d8877b664b22:/# exit
exit
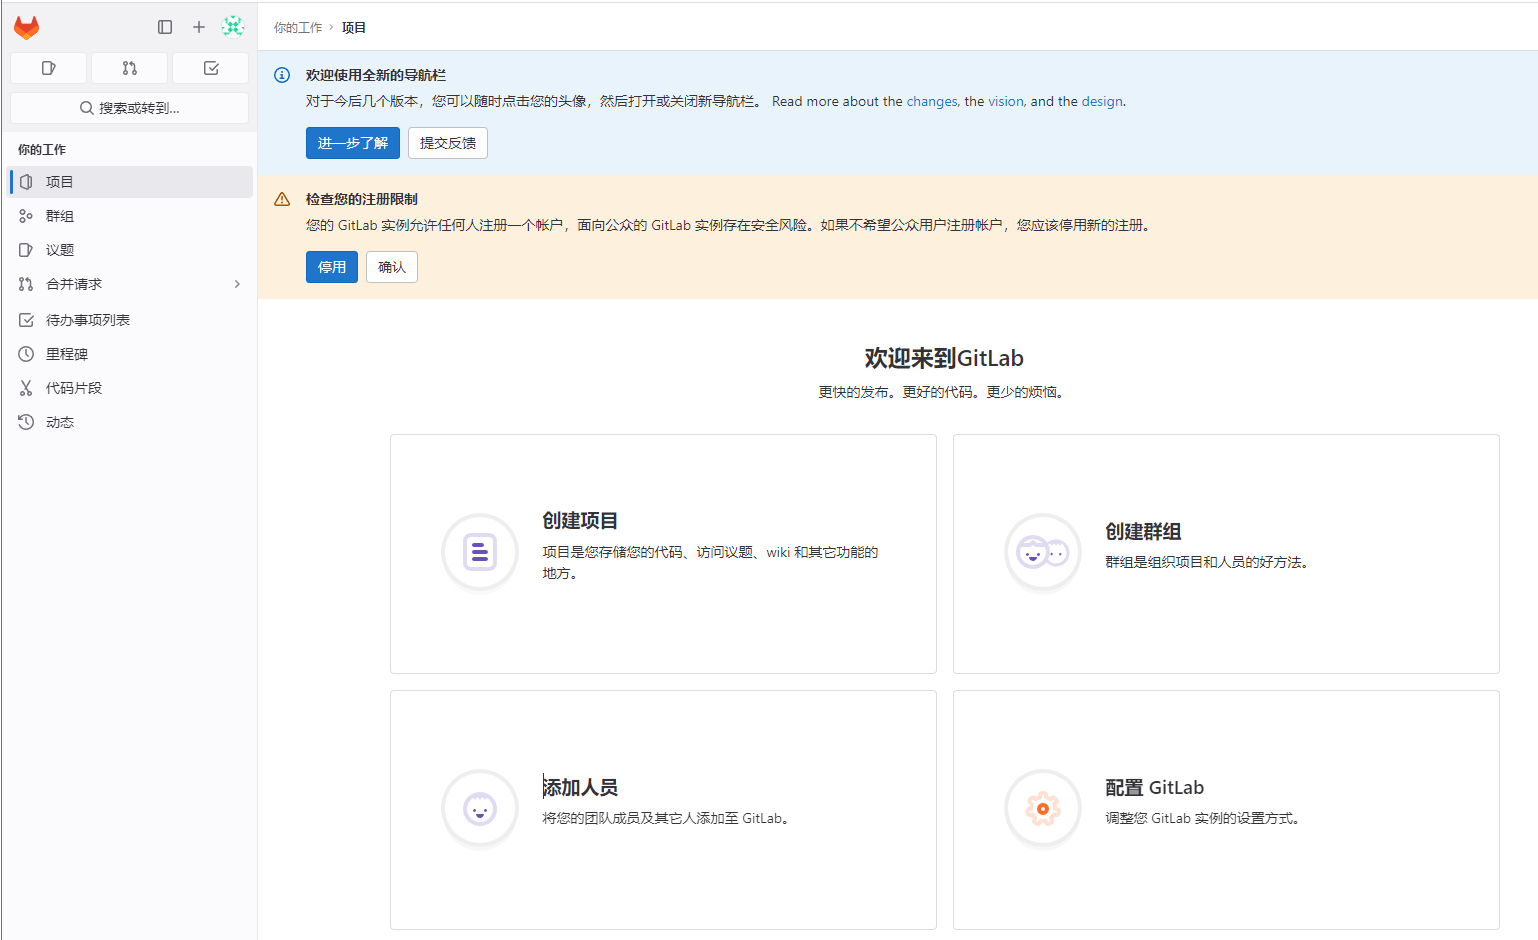
6.浏览器访问https:172.16.0.30:8929
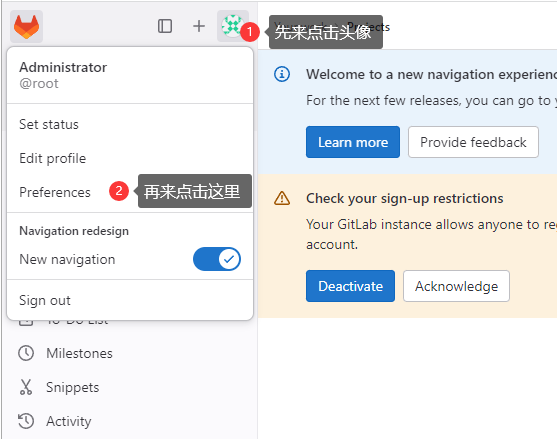
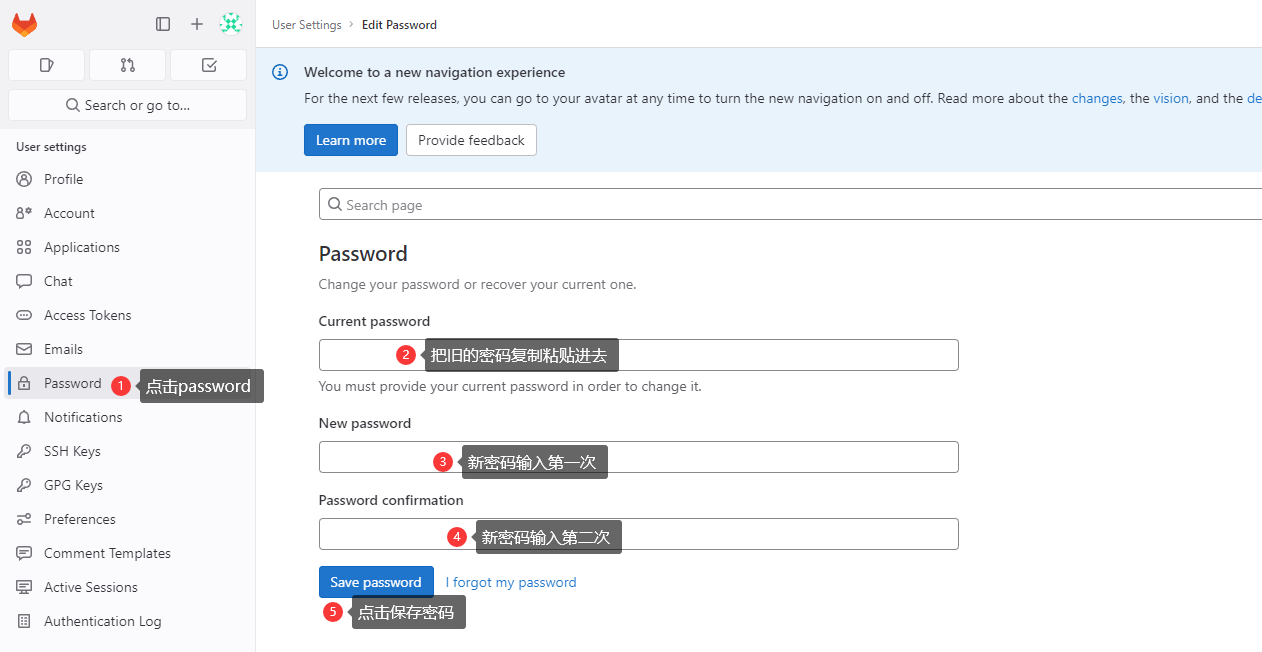
7.修改gitlab密码

7.修改界面为中文
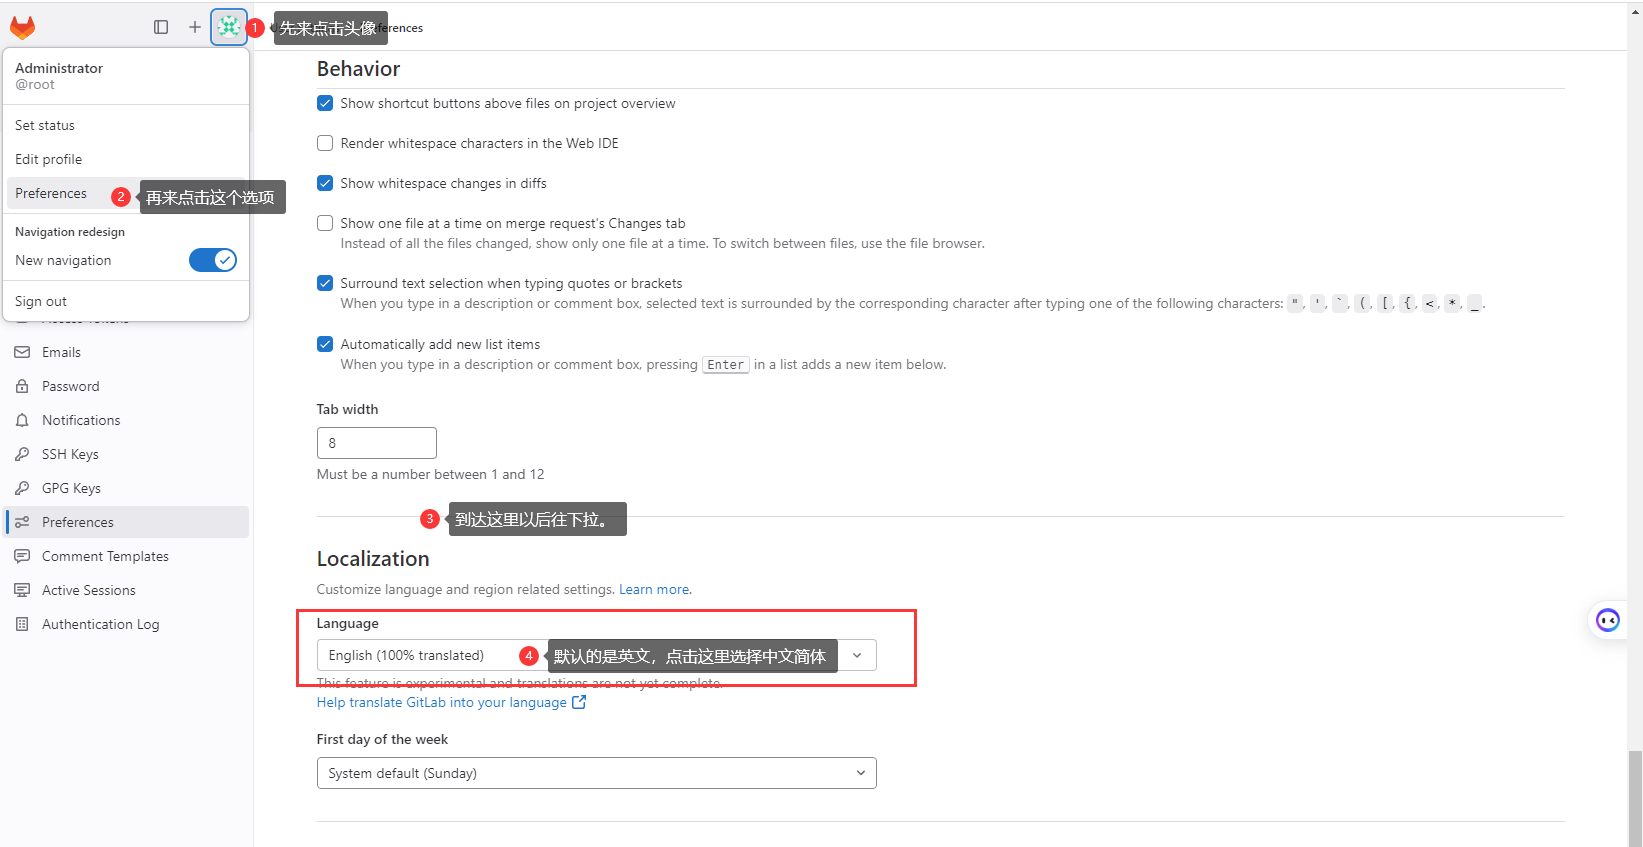
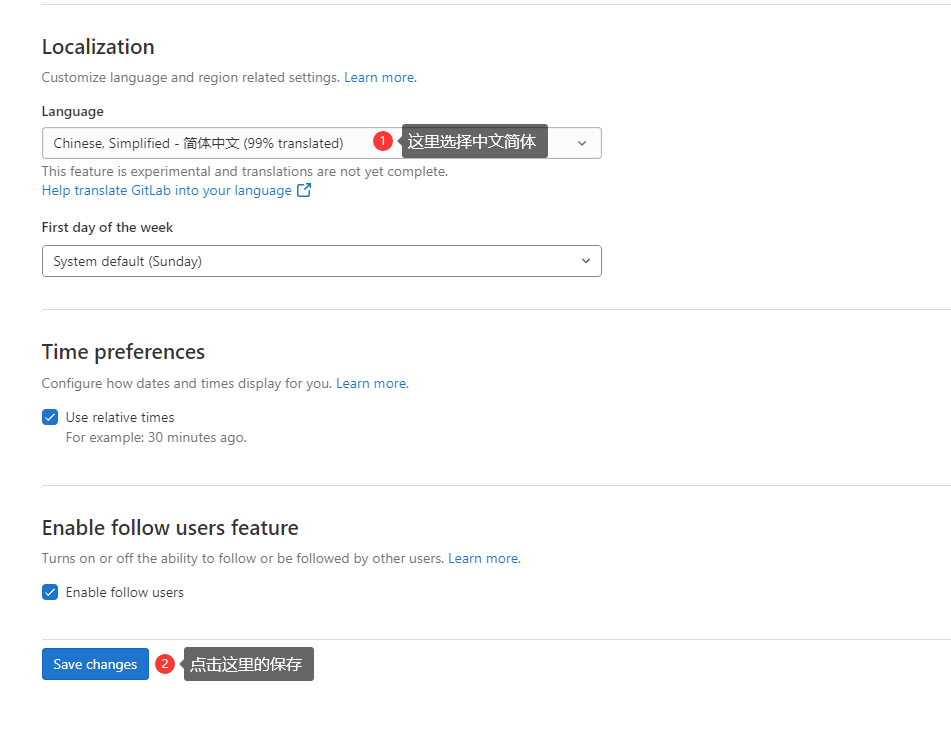
到这里以后,再来点击头像,把账号推出登录一下就是中文简体了