1
系统:rhel7.6
桌面环境,安装的时候选择
左侧选择,GUI的服务器,
右侧选择,java平台,KDE,性能工具,兼容性程序库,开发工具,系统管理工具

配置
CPU:4C
内存:8G
硬盘:80系统(/boot 1024,swap 8192,/根剩下所有)
50Goracle安装目录,
200G数据库存放,
400G数据库备份目录,
200G存放archive

设置为英文的环境变量
[root@rhel7 ~]# echo "export LANG=en_US" >> .bash_profile
[root@rhel7 ~]# source .bash_profile

查看磁盘设备
[root@rhel7 ~]# ls /dev/sd*
/dev/sda  /dev/sda1  /dev/sda2  /dev/sda3  /dev/sdb  /dev/sdc  /dev/sdd  /dev/sde

创建pv
[root@rhel7 ~]# pvcreate /dev/sd{b..e}
  Physical volume "/dev/sdb" successfully created.
  Physical volume "/dev/sdc" successfully created.
  Physical volume "/dev/sdd" successfully created.
  Physical volume "/dev/sde" successfully created.

创建vg
[root@rhel7 ~]# vgcreate oravg /dev/sdb
  Volume group "oravg" successfully created
[root@rhel7 ~]# vgcreate datavg /dev/sdc
  Volume group "datavg" successfully created
[root@rhel7 ~]# vgcreate backvg /dev/sdd
  Volume group "backvg" successfully created
[root@rhel7 ~]# vgcreate archvg /dev/sde
  Volume group "archvg" successfully created

给vg分区划分存储空间大小
[root@rhel7 ~]# lvcreate -n oralv -L 50000M oravg
  Logical volume "oralv" created.
[root@rhel7 ~]# lvcreate -n datalv -L 200000M datavg
  Logical volume "datalv" created.
[root@rhel7 ~]# lvcreate -n backlv -L 400000M backvg
  Logical volume "backlv" created.
[root@rhel7 ~]# lvcreate -n archivelv -L 200000 archvg
  Logical volume "archivelv" created.


格式化磁盘分区格式
[root@rhel7 ~]# mkfs.xfs /dev/backvg/backlv
meta-data=/dev/backvg/backlv     isize=512    agcount=4, agsize=25600000 blks
         =                       sectsz=512   attr=2, projid32bit=1
         =                       crc=1        finobt=0, sparse=0
data     =                       bsize=4096   blocks=102400000, imaxpct=25
         =                       sunit=0      swidth=0 blks
naming   =version 2              bsize=4096   ascii-ci=0 ftype=1
log      =internal log           bsize=4096   blocks=50000, version=2
         =                       sectsz=512   sunit=0 blks, lazy-count=1
realtime =none                   extsz=4096   blocks=0, rtextents=0
[root@rhel7 ~]# mkfs.xfs /dev/archvg/archivelv
meta-data=/dev/archvg/archivelv  isize=512    agcount=4, agsize=12800000 blks
         =                       sectsz=512   attr=2, projid32bit=1
         =                       crc=1        finobt=0, sparse=0
data     =                       bsize=4096   blocks=51200000, imaxpct=25
         =                       sunit=0      swidth=0 blks
naming   =version 2              bsize=4096   ascii-ci=0 ftype=1
log      =internal log           bsize=4096   blocks=25000, version=2
         =                       sectsz=512   sunit=0 blks, lazy-count=1
realtime =none                   extsz=4096   blocks=0, rtextents=0
[root@rhel7 ~]# mkfs.xfs /dev/datavg/datalv
meta-data=/dev/datavg/datalv     isize=512    agcount=4, agsize=12800000 blks
         =                       sectsz=512   attr=2, projid32bit=1
         =                       crc=1        finobt=0, sparse=0
data     =                       bsize=4096   blocks=51200000, imaxpct=25
         =                       sunit=0      swidth=0 blks
naming   =version 2              bsize=4096   ascii-ci=0 ftype=1
log      =internal log           bsize=4096   blocks=25000, version=2
         =                       sectsz=512   sunit=0 blks, lazy-count=1
realtime =none                   extsz=4096   blocks=0, rtextents=0
[root@rhel7 ~]# mkfs.xfs /dev/oravg/oralv
meta-data=/dev/oravg/oralv       isize=512    agcount=4, agsize=3200000 blks
         =                       sectsz=512   attr=2, projid32bit=1
         =                       crc=1        finobt=0, sparse=0
data     =                       bsize=4096   blocks=12800000, imaxpct=25
         =                       sunit=0      swidth=0 blks
naming   =version 2              bsize=4096   ascii-ci=0 ftype=1
log      =internal log           bsize=4096   blocks=6250, version=2
         =                       sectsz=512   sunit=0 blks, lazy-count=1
realtime =none                   extsz=4096   blocks=0, rtextents=0

添加到开机自启动
echo "/dev/oravg/oralv  /oracle xfs     defaults        0 0"  >> /etc/fstab
echo "/dev/datavg/datalv  /oradata xfs    defaults        0 0"  >> /etc/fstab
echo "/dev/backvg/backlv  /backup xfs     defaults        0 0"  >> /etc/fstab
echo "/dev/archvg/archivelv /archive xfs    defaults        0 0"  >> /etc/fstab

修改共享内存为6G
echo "none /dev/shm tmpfs   defaults,size=6144m 0 0"  >> /etc/fstab

重新挂载/dev/shm设备
[root@rhel7 ~]# mount -o remount /dev/shm

创建相关目录
[root@rhel7 ~]# mkdir -pv /{oracle,oradata,backup,archive}
mkdir: created directory '/oracle'
mkdir: created directory '/oradata'
mkdir: created directory '/backup'
mkdir: created directory '/archive'

挂载磁盘到相关的目录里面
[root@rhel7 ~]# mount -a

查看挂载情况
[root@rhel7 ~]# df -h
Filesystem                    Size  Used Avail Use% Mounted on
/dev/sda3                     150G  4.7G  146G   4% /
devtmpfs                      3.9G     0  3.9G   0% /dev
tmpfs                         6.0G     0  6.0G   0% /dev/shm
tmpfs                         3.9G  9.2M  3.9G   1% /run
tmpfs                         3.9G     0  3.9G   0% /sys/fs/cgroup
/dev/sda1                     2.0G  173M  1.9G   9% /boot
tmpfs                         783M   12K  783M   1% /run/user/42
tmpfs                         783M     0  783M   0% /run/user/0
/dev/mapper/oravg-oralv        49G   33M   49G   1% /oracle
/dev/mapper/datavg-datalv     196G   33M  196G   1% /oradata
/dev/mapper/backvg-backlv     391G   33M  391G   1% /backup
/dev/mapper/archvg-archivelv  196G   33M  196G   1% /archive

创建用户属主属组
[root@rhel7 ~]# groupadd  -g 60001 oinstall
[root@rhel7 ~]# groupadd  -g 60002 dba
[root@rhel7 ~]# groupadd  -g 60003 oper

创建用户并加入到指定用户组里
[root@rhel7 ~]# useradd -u 61001 -g oinstall -G dba,oper oracle

查看oracle用户的属主属组
[root@rhel7 ~]# id oracle
uid=61001(oracle) gid=60001(oinstall) groups=60001(oinstall),60002(dba),60003(oper)

想相关目录授权属主属组对应的权限
[root@rhel7 ~]# chown -R oracle:oinstall /oracle
[root@rhel7 ~]# chown -R oracle:dba /oradata
[root@rhel7 ~]# chown -R oracle:dba /backup
[root@rhel7 ~]# chown -R oracle:dba /archive

授权755权限给目录
[root@rhel7 ~]# chmod -R 775 /oracle
[root@rhel7 ~]# chmod -R 775 /oradata
[root@rhel7 ~]# chmod -R 775 /backup
[root@rhel7 ~]# chmod -R 775 /archive

修改oracle的用户密码,我这里设置的oracle密码是123456
[root@rhel7 ~]# passwd oracle
Changing password for user oracle.
New password:
BAD PASSWORD: The password is shorter than 8 characters
Retype new password:
passwd: all authentication tokens updated successfully.


配置本地光盘yum源为rpm源
先删除默认的
[root@rhel7 ~]# rm -rf /etc/yum.repos.d/*.repo

再来添加,全部复制到EFO结束,直接粘贴回车就行了
cat <<EFO>> /etc/yum.repos.d/base.repo
[base]
basename=base
baseurl=file:///mnt
gpgcheck=0
EFO

挂载iso光盘
[root@rhel7 ~]# mount /dev/sr0 /mnt/
mount: /dev/sr0 is write-protected, mounting read-only

开机自动挂载
[root@rhel7 ~]# echo "/dev/sr0 /mnt       iso9660     defaults     0  0" >> /etc/fstab

安装相关rpm包
yum -y install autoconf
yum -y install automake
yum -y install binutils
yum -y install binutils-devel
yum -y install bison
yum -y install cpp
yum -y install dos2unix
yum -y install gcc
yum -y install gcc-c++
yum -y install lrzsz
yum -y install python-devel
yum -y install compat-db*
yum -y install compat-gcc-34
yum -y install compat-gcc-34-c++
yum -y install compat-libcap1
yum -y install compat-libstdc++-33
yum -y install compat-libstdc++-33.i686
yum -y install glibc-*
yum -y install glibc-*.i686
yum -y install libXpm-*.i686
yum -y install libXp.so.6
yum -y install libXt.so.6
yum -y install libXtst.so.6
yum -y install libXext
yum -y install libXext.i686
yum -y install libXtst
yum -y install libXtst.i686
yum -y install libX11
yum -y install libX11.i686
yum -y install libXau
yum -y install libXau.i686
yum -y install libxcb
yum -y install libxcb.i686
yum -y install libXi
yum -y install libXi.i686
yum -y install libXtst
yum -y install libstdc++-docs
yum -y install libgcc_s.so.1
yum -y install libstdc++.i686
yum -y install libstdc++-devel
yum -y install libstdc++-devel.i686
yum -y install libaio
yum -y install libaio.i686
yum -y install libaio-devel
yum -y install libaio-devel.i686
yum -y install libXp
yum -y install libaio-devel
yum -y install numactl
yum -y install numactl-devel
yum -y install make -y
yum -y install sysstat -y
yum -y install unixODBC
yum -y install unixODBC-devel
yum -y install elfutils-libelf-devel-0.97
yum -y install elfutils-libelf-devel
yum -y install redhat-lsb-core
yum -y install unzip
yum -y install *vnc*


修改资源限制参数,oracle的软硬件的限制
cat <<EFO>>/etc/security/limits.conf
oracle           soft    nproc   16384
oracle           hard    nproc   16384
oracle           soft    nofile  16384
oracle           hard    nofile  65536
oracle           soft    stack   10240
oracle           hard    stack   32768
oracle           hard    memlock 8000000
oracle           soft  memlock 8000000
EFO

解释:
memlock 8000000
内存限制,这是8G限制,根据自己的实际需求限制
单位KB,略低于实际内存
解释:

nofile——最大可以打开的文件数量

nproc——最大运行进程数

[root@rhel7 ~]# vim /etc/security/limits.d/20-nproc.conf
注释掉所有的在最后一行添加#是注释掉的内容
#*          soft    nproc     4096
#root       soft    nproc     unlimited
* soft nproc 16384


控制给用户分配的资源
[root@rhel7 ~]# echo "session required pam_limits.so" >> /etc/pam.d/login


修改内核参数

cat <<EFO>> /etc/sysctl.conf
fs.aio-max-nr = 1048576
fs.file-max = 6815744
net.ipv4.ip_local_port_range = 9000 65500
net.core.rmem_default = 262144
net.core.rmem_max = 4194304
net.core.wmem_default = 262144
net.core.wmem_max = 1048586
#kernel_panic_on_oops = 1 12C安装需要添加
kernel.shmmax = 5033164800
kernel.shmall = 393216
kernel.shmmni = 4096
kernel.sem = 250 32000 100 128
vm.nr_hugepages = 2500
EFO

解释:
kernel.shmmax = 5033164800
单个共享内存段最大值,让数据库在一个共享段里面可以容纳整个sga
例:
8G:数据库最大使用内存,不要超过物理内存的80%(sga*80%+pga*20%)
8G:sga<4.8G,pga<1.6G
最好sga不要超过60
换算内容如下:
4.8*1024*1024*1024=5153960755
或
按兆(MB)来算
4800*1024*1024=5033164800

kernel.shmall = 393216
控制共享内存页数
kernel.shmall = 393216=shmmax➗PAGESIZE=5033164800➗4800=1228800

kernel.shmmni = 4096
共享内存段的最大数量不要改动

vm.nr_hugepages = 2500
大内存页
生产环境LINUX必须配置,否则性能很差,物理内存大于8G必配
计算方法:
(sga_max_size+512MB或者1G)➗2 < memlock
4.8+1➗2=2.9=2.9(2900)
或
sga_max_size➗2+100MB
    4.8➗2+100MB=2.5(2500)


让修改生效
[root@rhel7 ~]# sysctl -p
fs.aio-max-nr = 1048576
fs.file-max = 6815744
net.ipv4.ip_local_port_range = 9000 65500
net.core.rmem_default = 262144
net.core.rmem_max = 4194304
net.core.wmem_default = 262144
net.core.wmem_max = 1048586
#kernel_panic_on_oops = 1 12C安装需要添加
kernel.shmmax = 5033164800
kernel.shmall = 393216
kernel.shmmni = 4096
kernel.sem = 250 32000 100 128
vm.nr_hugepages = 2500

#(针对6.x解决bug用) 关闭透明页
查看是否开启
#检查
#cat /sys/kernel/mm/transparent_hugepage/defrag
#cat /sys/kernel/mm/transparent_hugepage/enabled

[root@rhel7 ~]# cat /sys/kernel/mm/transparent_hugepage/enabled
always madvise [always]

关掉透明页面
vi /etc/rc.d/rc.local
最后一行写入一下内容
if test -f /sys/kernel/mm/transparent_hugepage/enabled; then
echo never > /sys/kernel/mm/transparent_hugepage/enabled
fi
if test -f /sys/kernel/mm/transparent_hugepage/defrag; then
echo never > /sys/kernel/mm/transparent_hugepage/defrag
fi

添加执行权限
chmod +x /etc/rc.d/rc.local


关闭numa功能,防止内存交换机,页面交换
先安装包
[root@rhel7 ~]# yum install numactl -y

[root@rhel7 ~]# vi /etc/default/grub
GRUB_TIMEOUT=5
GRUB_DISTRIBUTOR="$(sed 's, release .*$,,g' /etc/system-release)"
GRUB_DEFAULT=saved
GRUB_DISABLE_SUBMENU=true
GRUB_TERMINAL_OUTPUT="console"
GRUB_CMDLINE_LINUX="crashkernel=auto numa=off  biosdevname=0 net.ifnames=0 rhgb quiet"
GRUB_DISABLE_RECOVERY="true"

在GRUB_CMDLINE_LINUX="crashkernel=auto后面添加numa=off

[root@rhel7 ~]# grub2-mkconfig -o /etc/grub2.cfg
Generating grub configuration file ...
Found linux image: /boot/vmlinuz-3.10.0-957.el7.x86_64
Found initrd image: /boot/initramfs-3.10.0-957.el7.x86_64.img
Found linux image: /boot/vmlinuz-0-rescue-714e84ecbf914ceeb8d07ce606438f1b
Found initrd image: /boot/initramfs-0-rescue-714e84ecbf914ceeb8d07ce606438f1b.img
done

重建grub 配置文件:

MBR 分区表

grub2-mkconfig -o /etc/grub2.cfg

efi 引导模式, efi + GPT分区表

grub2-mkconfig -o /etc/grub2-efi.cfg

.重启操作系统:
[root@rhel7 ~]# reboot


.重启之后进行确认
[root@rhel7 ~]# dmesg|grep -i numa
[    0.000000] Command line: BOOT_IMAGE=/vmlinuz-3.10.0-957.el7.x86_64 root=UUID=123e4d3c-ec69-4fa0-9c38-affd20456130 ro crashkernel=auto numa=off biosdevname=0 net.ifnames=0 rhgb quiet
[    0.000000] NUMA turned off
[    0.000000] Kernel command line: BOOT_IMAGE=/vmlinuz-3.10.0-957.el7.x86_64 root=UUID=123e4d3c-ec69-4fa0-9c38-affd20456130 ro crashkernel=auto numa=off biosdevname=0 net.ifnames=0 rhgb quiet

再次确认:
[root@rhel7 ~]# cat /proc/cmdline
BOOT_IMAGE=/vmlinuz-3.10.0-957.el7.x86_64 root=UUID=123e4d3c-ec69-4fa0-9c38-affd20456130 ro crashkernel=auto numa=off biosdevname=0 net.ifnames=0 rhgb quiet

链接:https://blog.csdn.net/llh931886/article/details/114361256

切换到oracle用户
[root@rhel7 ~]# su - oracle

修改环境变量
[oracle@rhel7 ~]$ vi ~/.bash_profile
最后一行写入以下内容
先把这两行注释掉
#PATH=$PATH:$HOME/.local/bin:$HOME/bin
#export PATH

再写入以下内容
#PS1="[`whoami`@`hostname`:"'$PWD]$'
#export PS1
export TMP=/tmp
export  LANG=en_US
export TMPDIR=$TMP
export ORACLE_UNQNAME=zrth
ORACLE_SID=zrth; export ORACLE_SID
ORACLE_BASE=/oracle/app/oracle; export ORACLE_BASE
ORACLE_HOME=$ORACLE_BASE/product/11.2.0/db_1; export ORACLE_HOME
ORACLE_TERM=xterm; export ORACLE_TERM
NLS_DATE_FORMAT="yyyy-mm-dd HH24:MI:SS"; export NLS_DATE_FORMAT
NLS_LANG=AMERICAN_AMERICA.ZHS16GBK;export NLS_LANG
PATH=.:$PATH:$HOME/.local/bin:$HOME/bin:$ORACLE_BASE/product/11.2.0/db_1/bin:$ORACLE_HOME/bin; export PATH
THREADS_FLAG=native; export THREADS_FLAG
umask=022


让环境变量生效并检查
[oracle@rhel7 ~]$ source ~/.bash_profile
[oracle@rhel7 ~]$ env|grep ORACLE
ORACLE_UNQNAME=zrth
ORACLE_SID=zrth
ORACLE_BASE=/oracle/app/oracle
ORACLE_TERM=xterm
ORACLE_HOME=/oracle/app/oracle/product/11.2.0/db_1
软件包版本11.2.0.4

可以用winscp上传到服务器上面去
用oracle用户登录上传到服务器上面去

如图所示,目录的文件夹是补丁
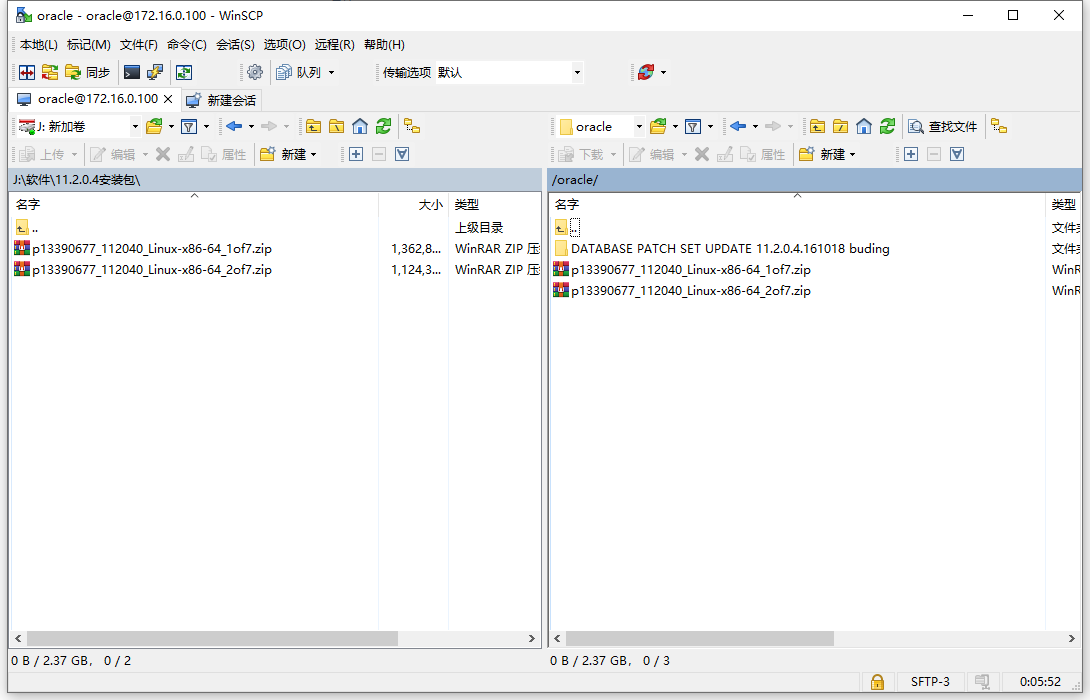
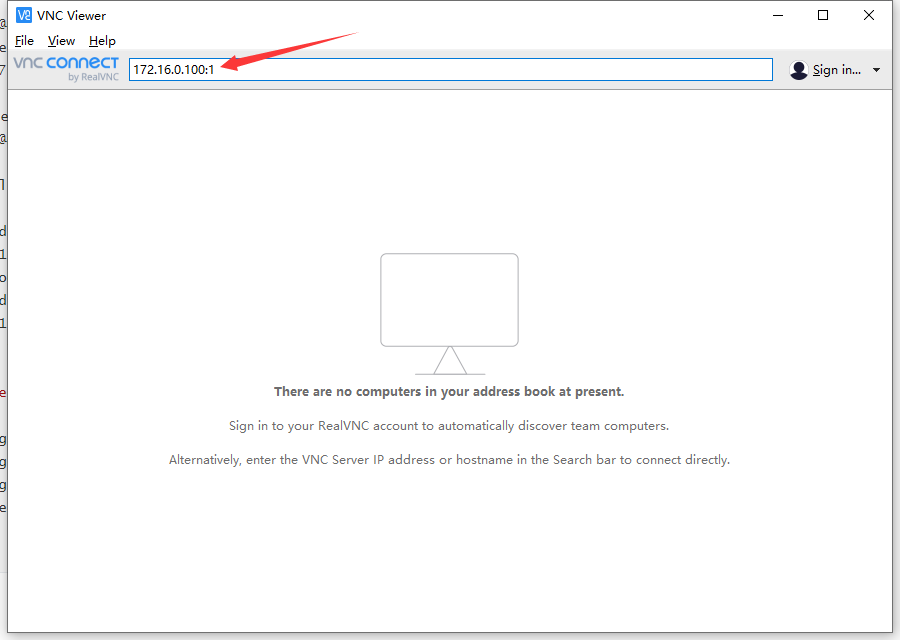
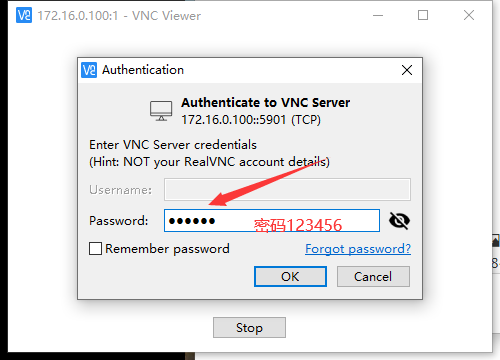
切换到oracle用户登录
[root@rhel7 ~]# su - oracle
Last login: Wed Oct  5 02:45:07 CST 2022 on pts/1

进入到/oracle目录下
[oracle@rhel7 ~]$ cd /oracle/

查看/oracle目录下的文件是否正确
[oracle@rhel7 oracle]$ ls
DATABASE PATCH SET UPDATE 11.2.0.4.161018 buding  p13390677_112040_Linux-x86-64_1of7.zip  p13390677_112040_Linux-x86-64_2of7.zip

解压p13390677_112040_Linux-x86-64_1of7.zip包
[oracle@rhel7 oracle]$ unzip p13390677_112040_Linux-x86-64_1of7.zip

解压p13390677_112040_Linux-x86-64_2of7.zip包
[oracle@rhel7 oracle]$ unzip p13390677_112040_Linux-x86-64_2of7.zip

查看
[oracle@rhel7 oracle]$ ls
database  DATABASE PATCH SET UPDATE 11.2.0.4.161018 buding  p13390677_112040_Linux-x86-64_1of7.zip  p13390677_112040_Linux-x86-64_2of7.zip

启动vncserver
[oracle@rhel7 oracle]$ vncserver

You will require a password to access your desktops.

Password:123456(密码不显示)
Verify:123456(密码不显示)
Would you like to enter a view-only password (y/n)? y
Password:123456(密码不显示)
Verify:123456(密码不显示)
xauth:  file /home/oracle/.Xauthority does not exist

New 'rhel7.6-1:1 (oracle)' desktop is rhel7.6-1:1

Creating default startup script /home/oracle/.vnc/xstartup
Creating default config /home/oracle/.vnc/config
Starting applications specified in /home/oracle/.vnc/xstartup
Log file is /home/oracle/.vnc/rhel7.6-1:1.log
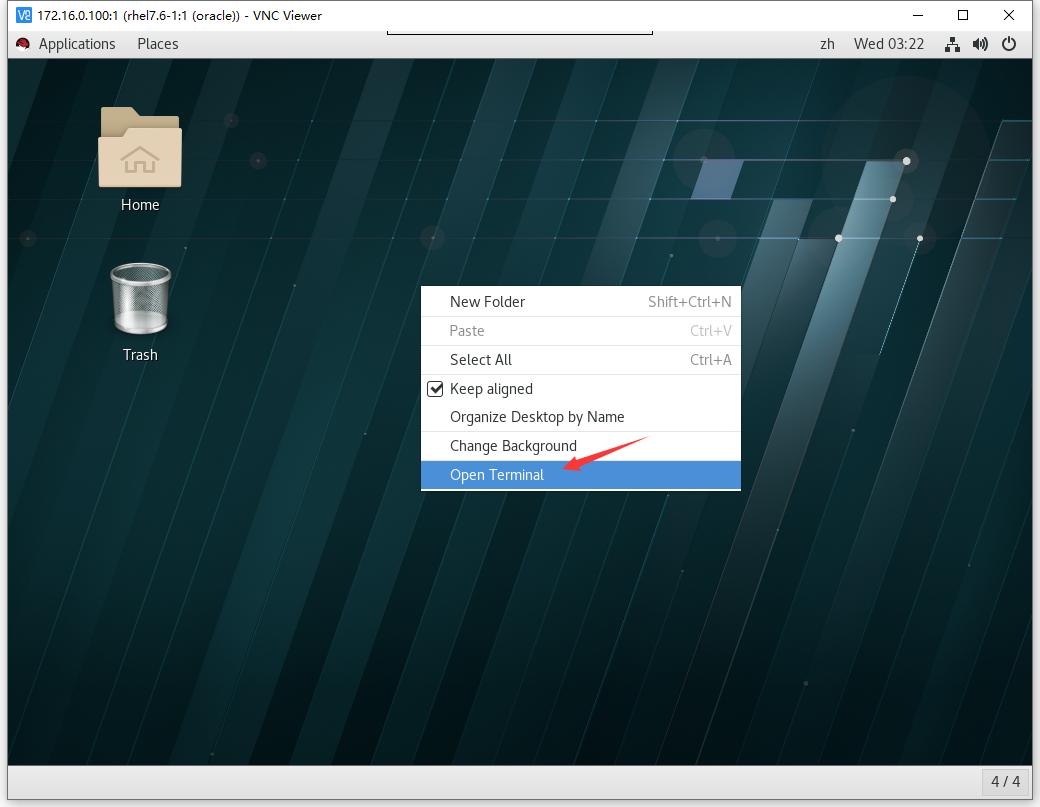
打开vnc
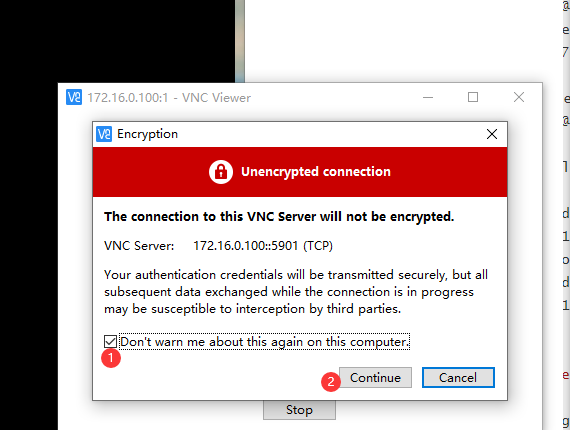
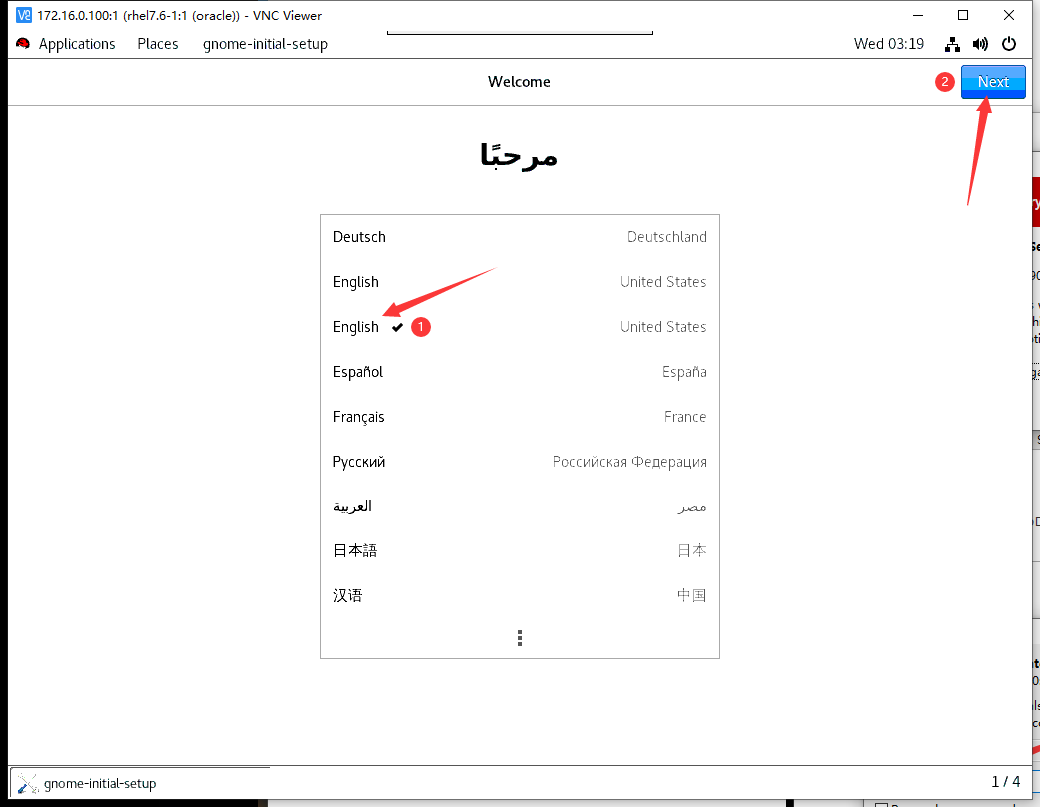
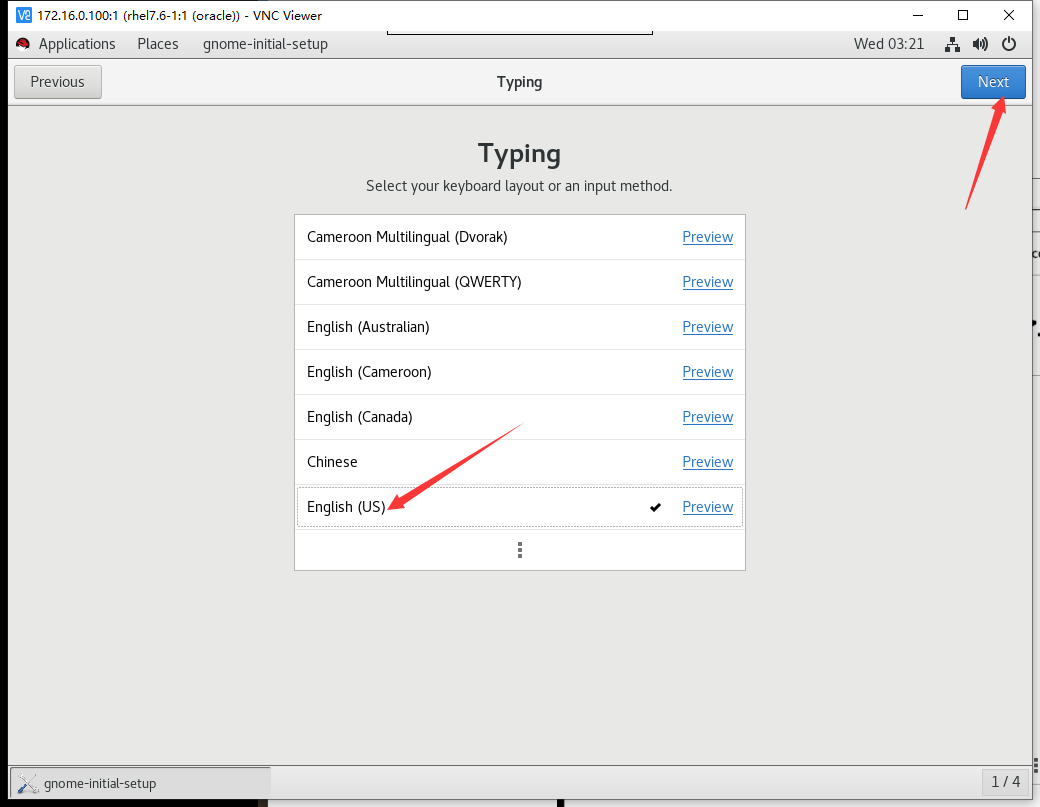

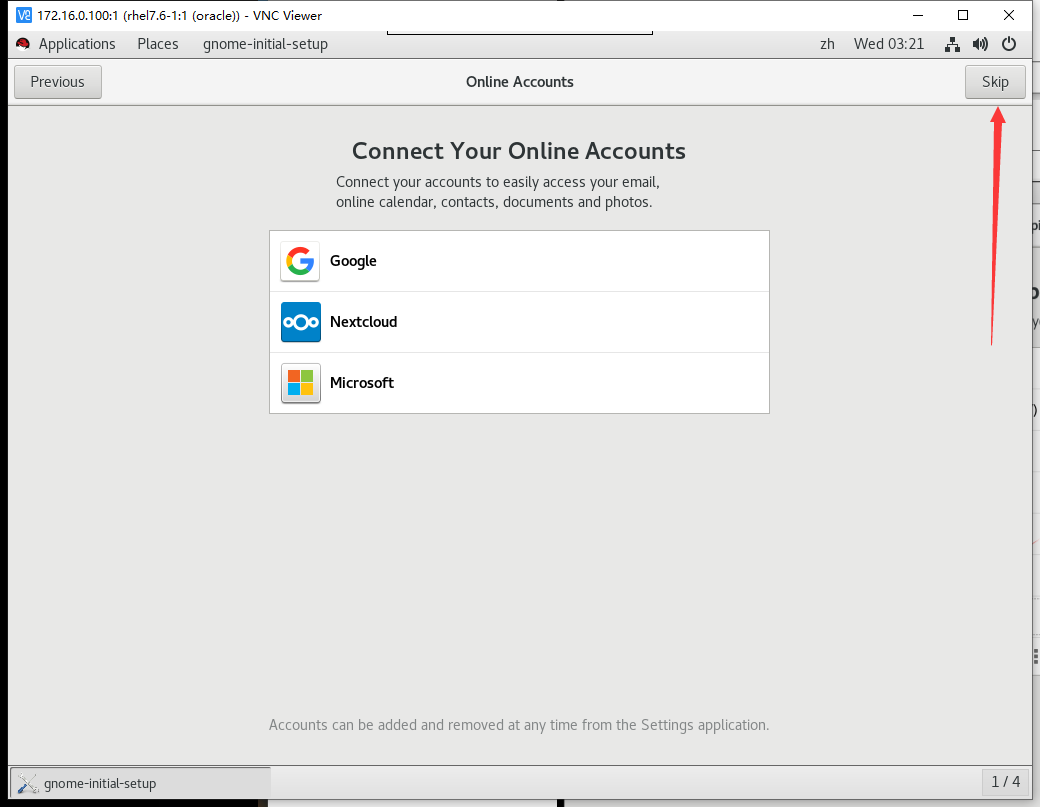
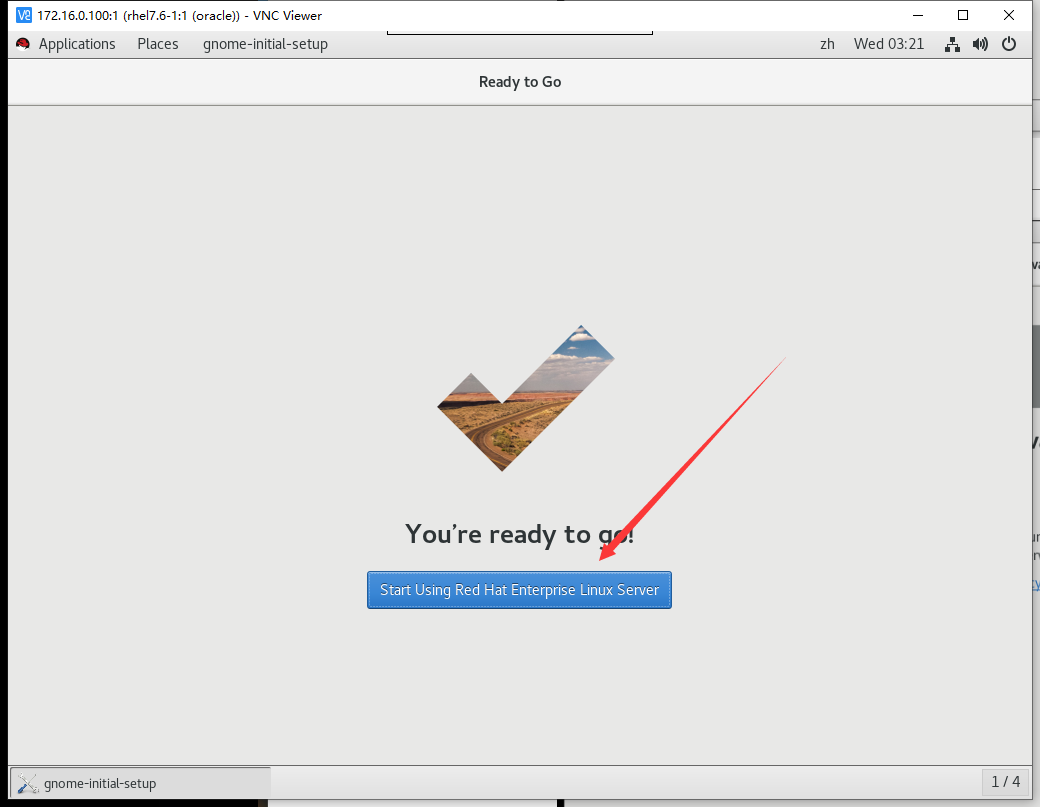
进入到桌面以后

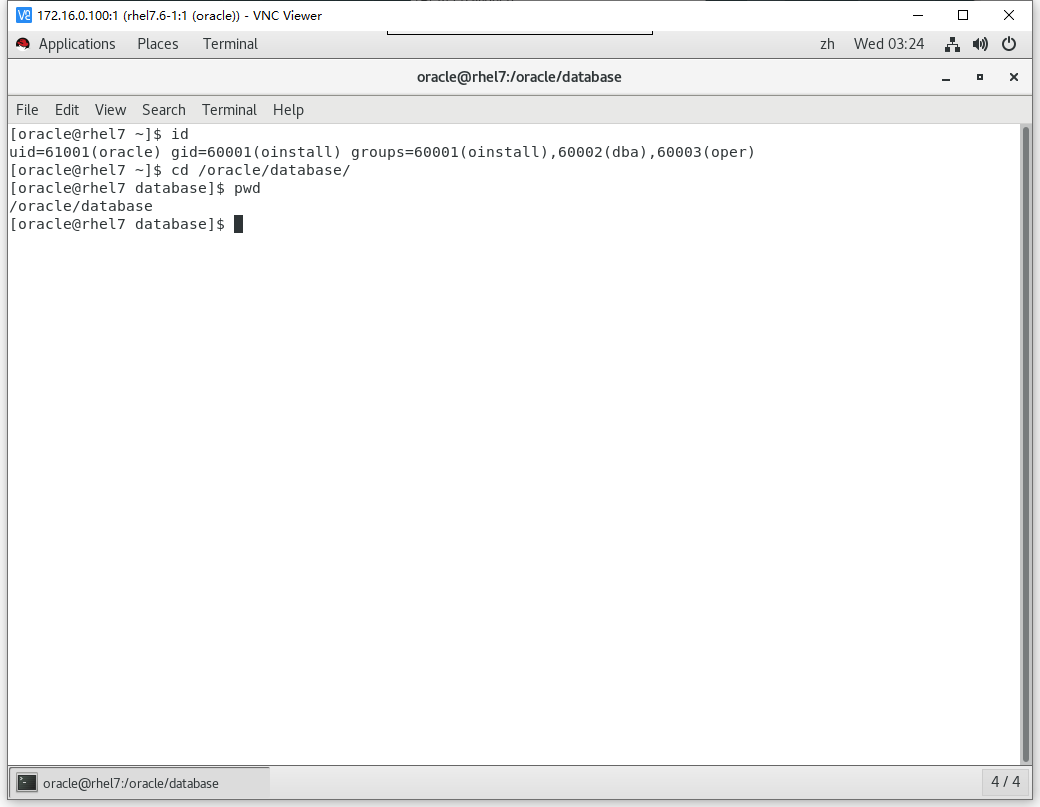
新打开一个shell对话
进入到/oracle/database
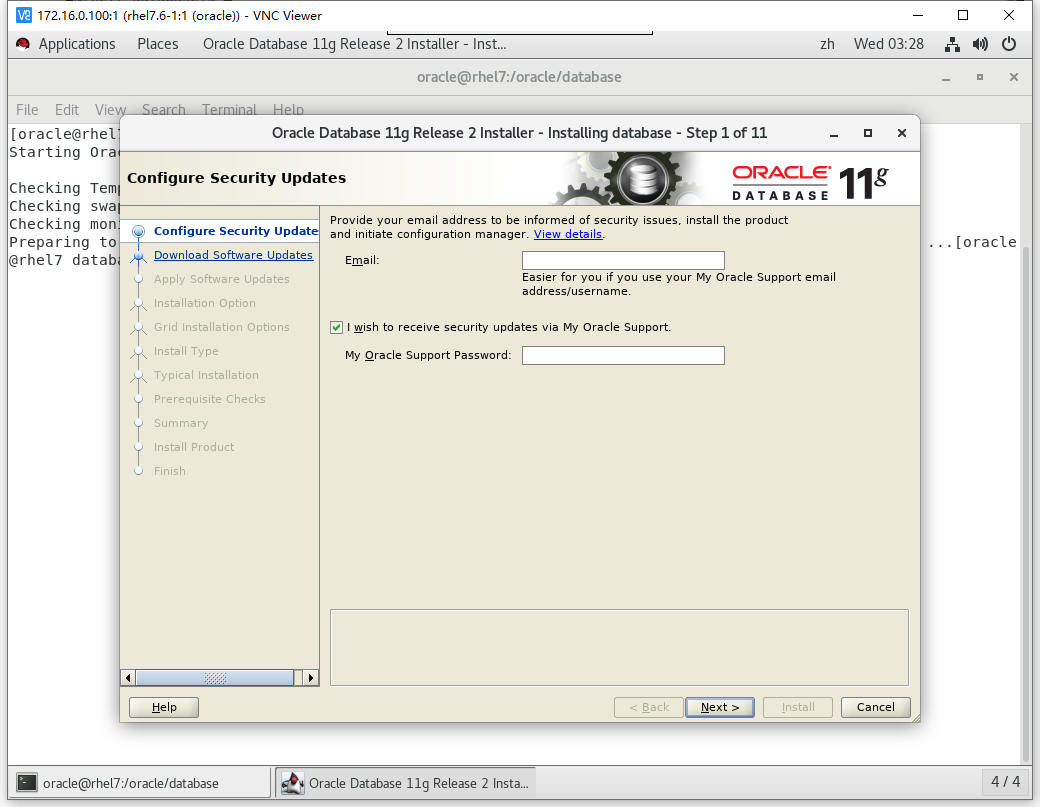
rhel7下执行如下参数。不能直接用./runInstaller,会有问题出现
./runInstaller -jreLoc /etc/alternatives/jre_1.8.0

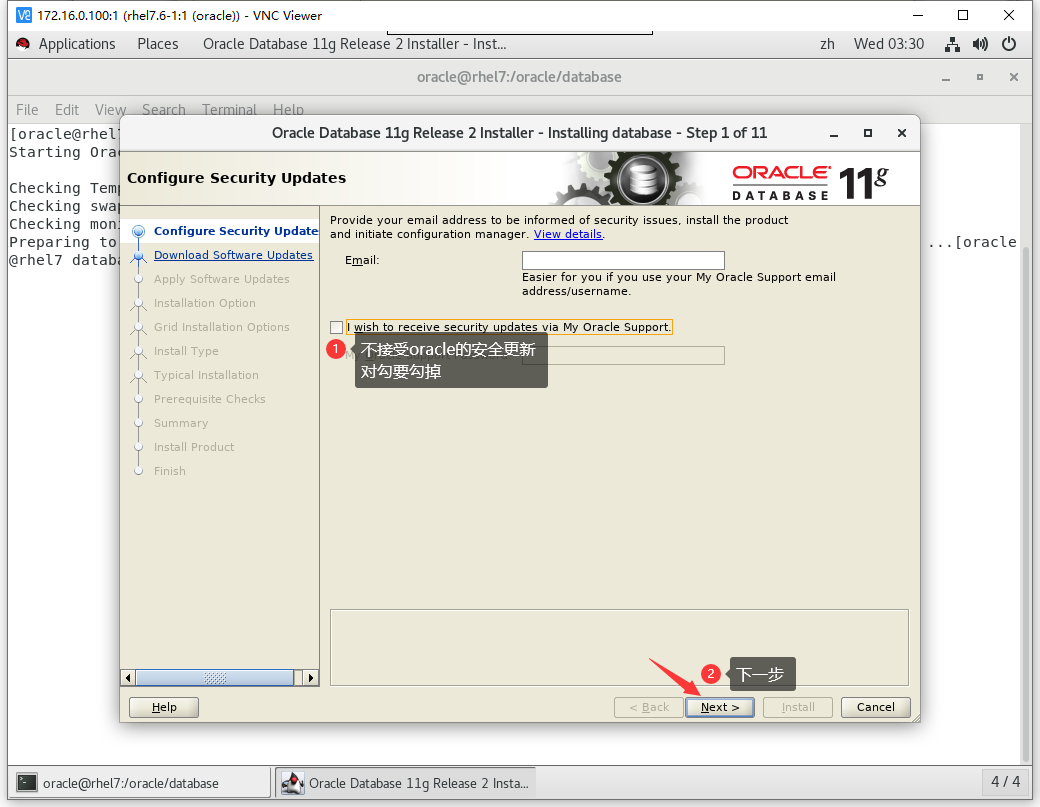
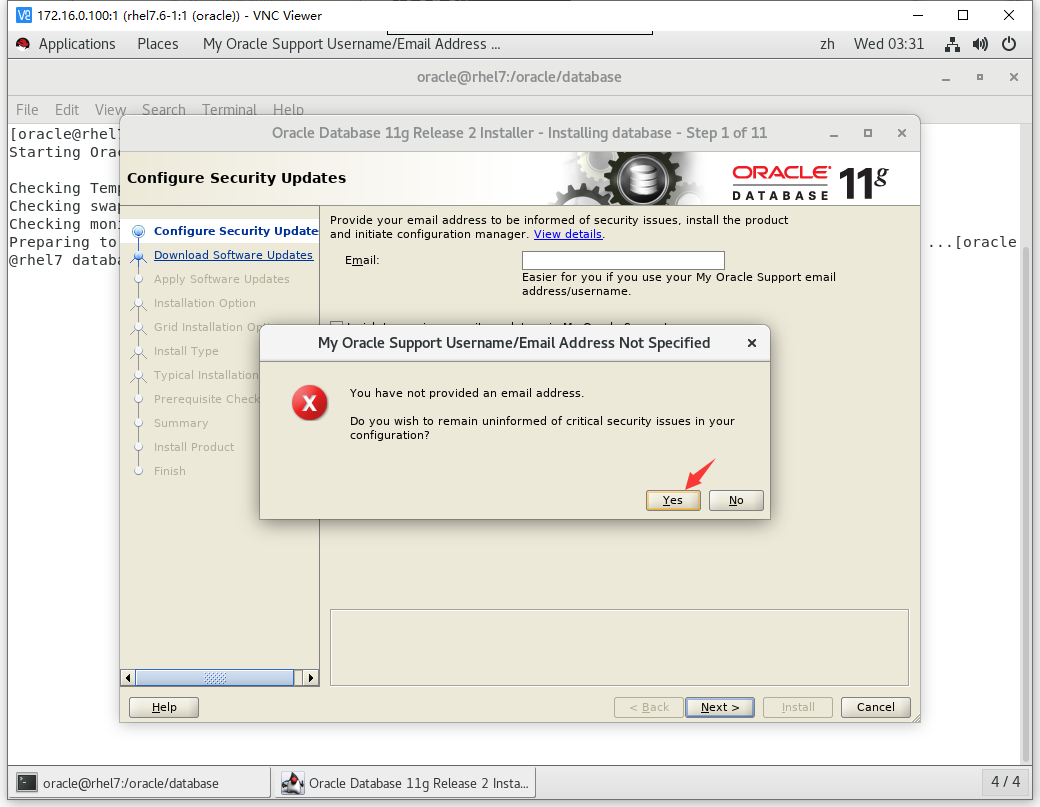
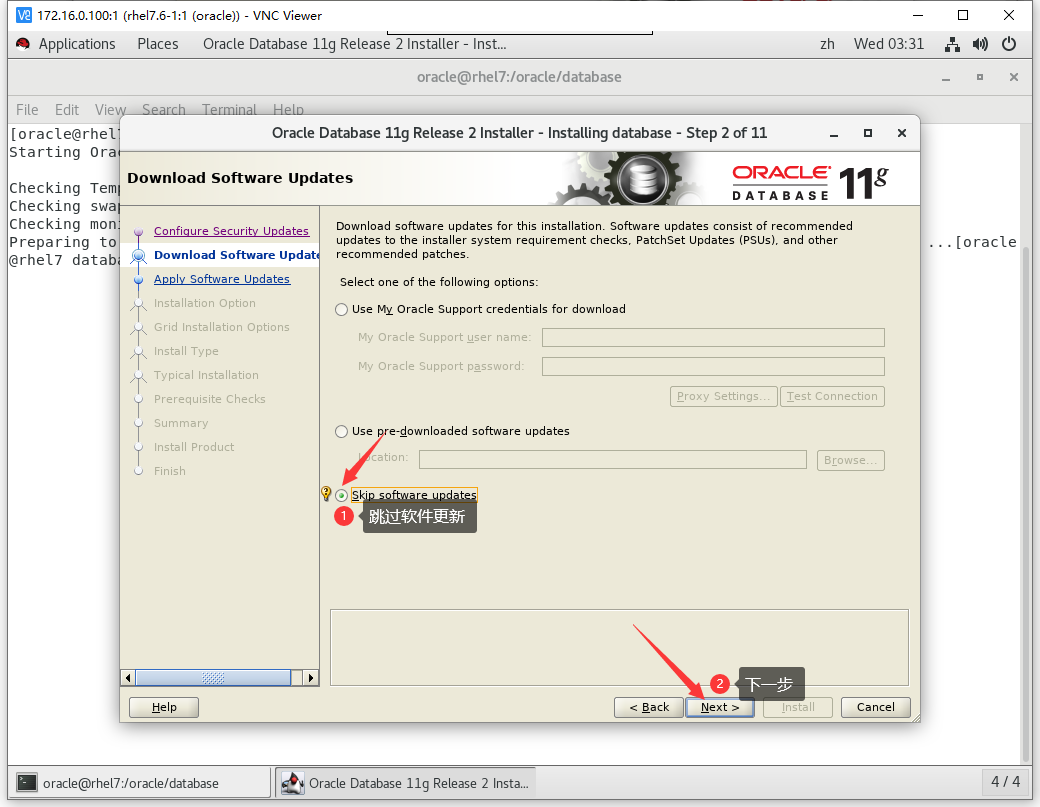
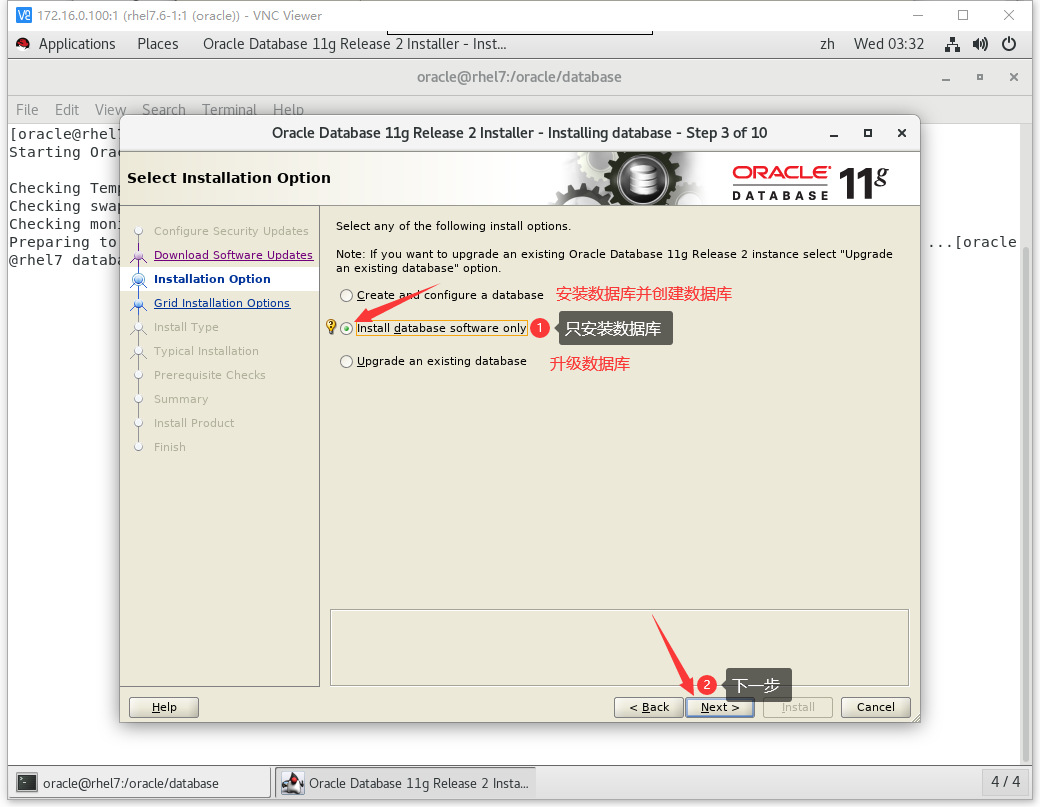
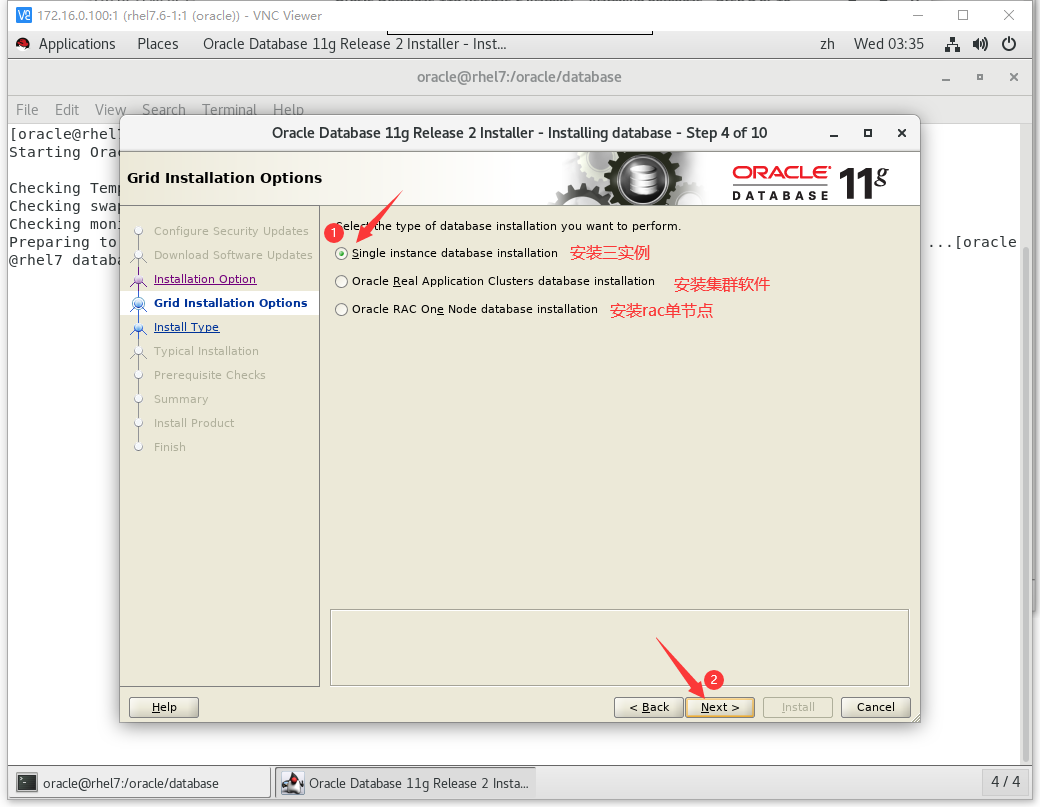
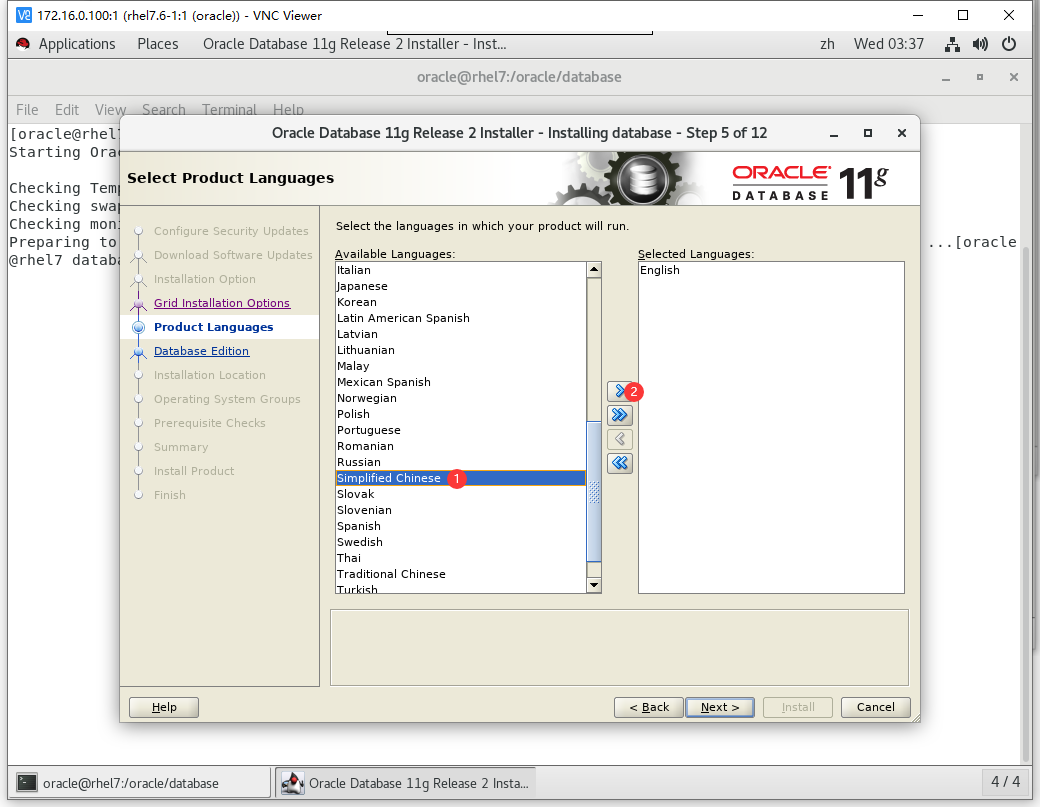
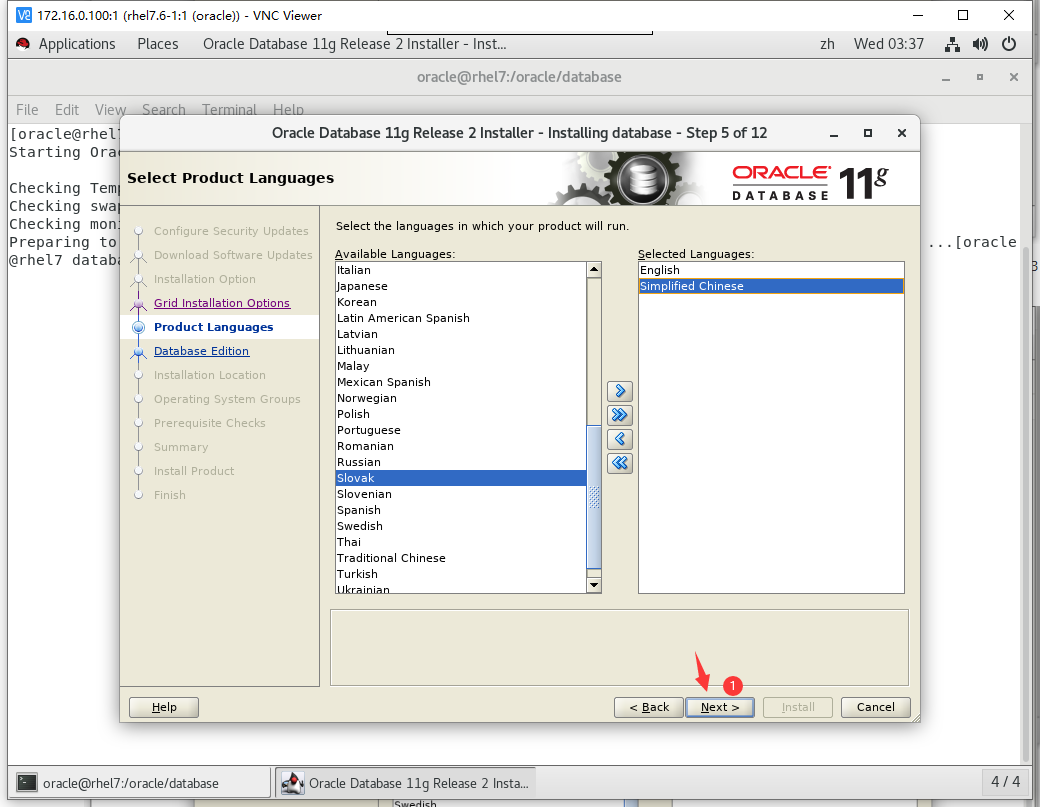
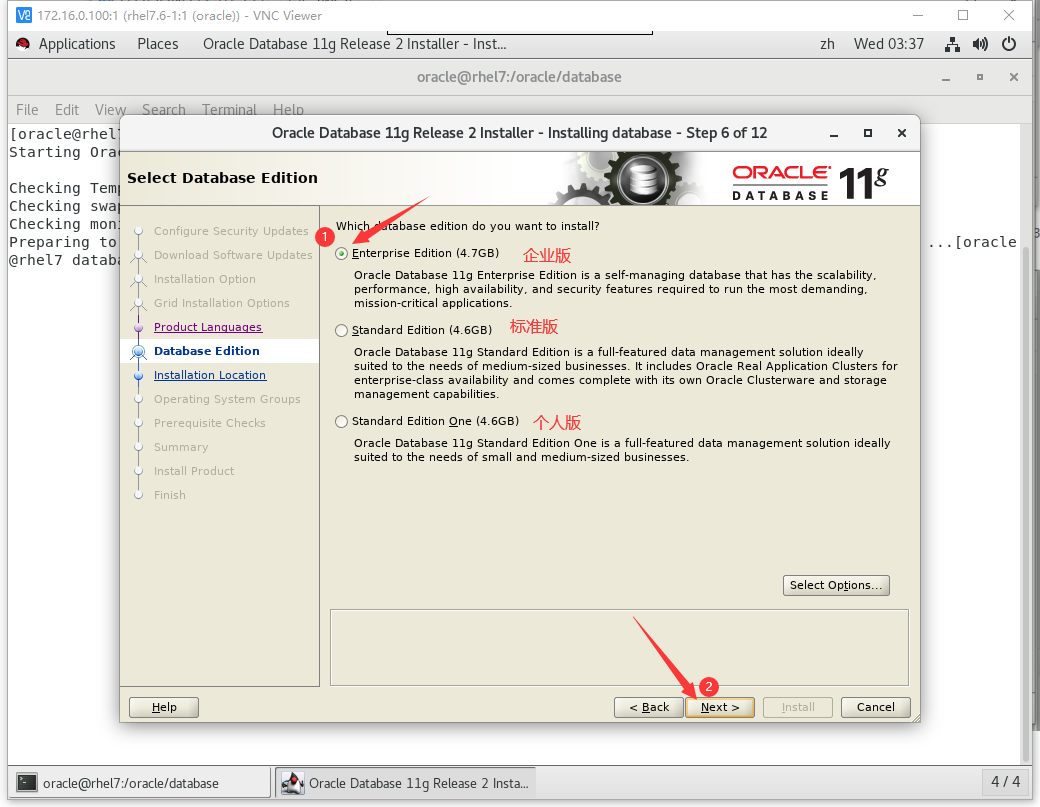
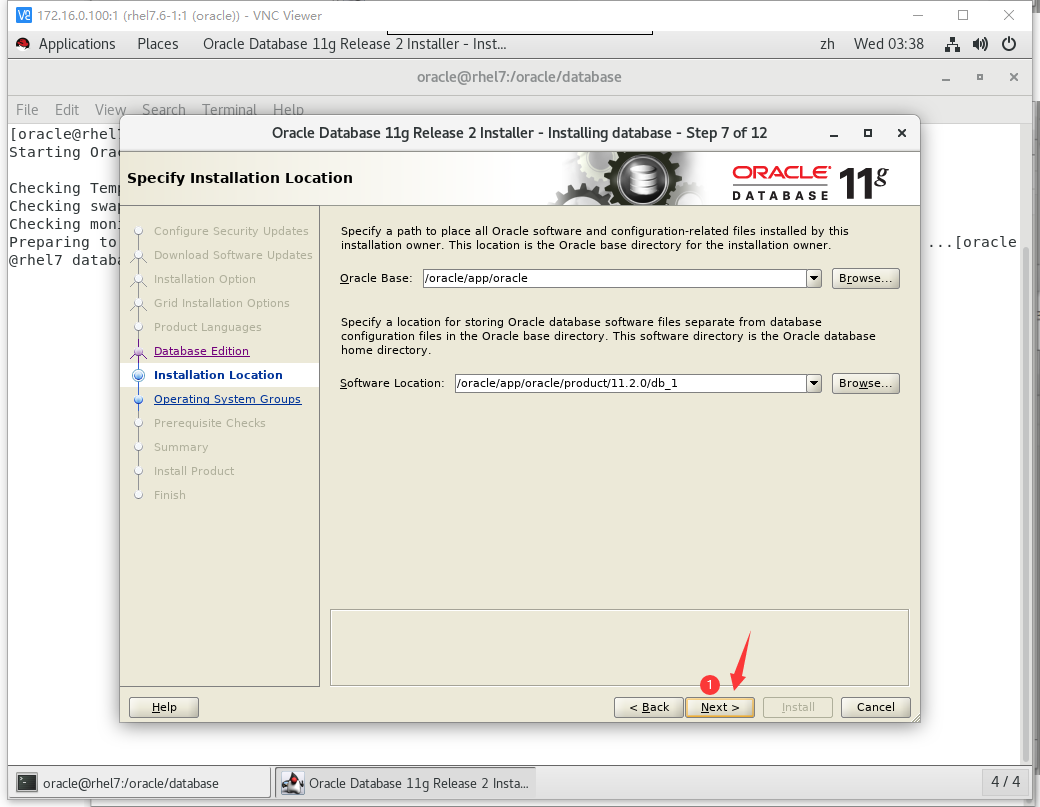
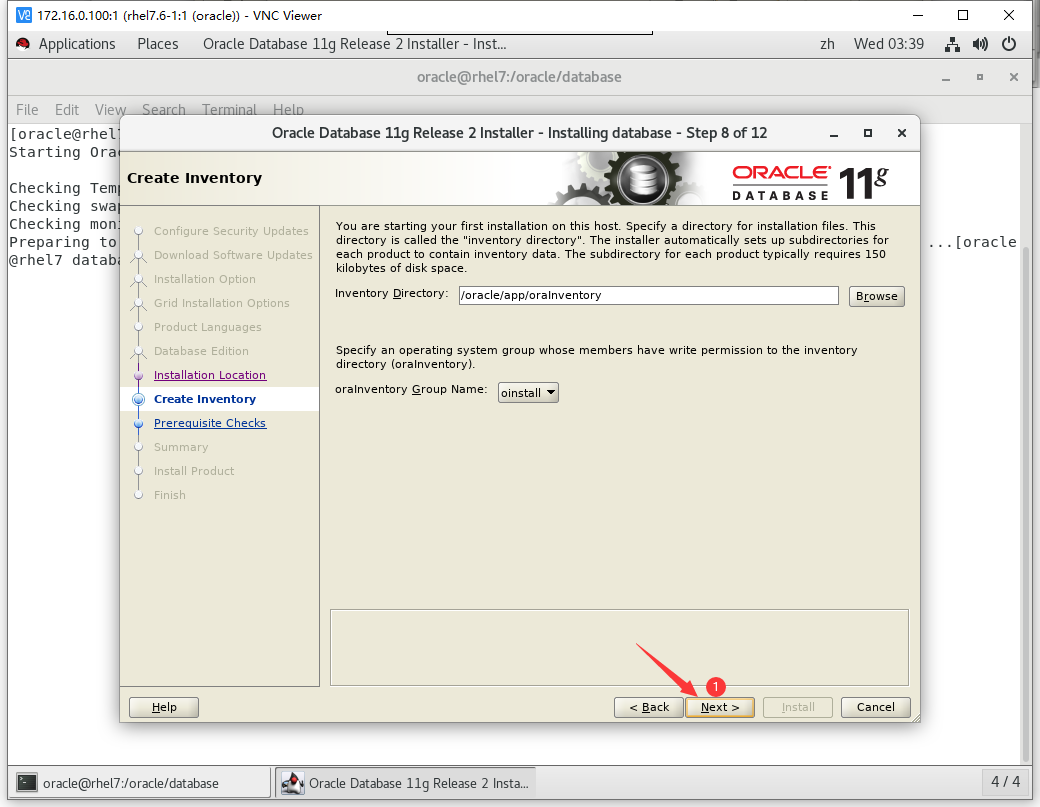
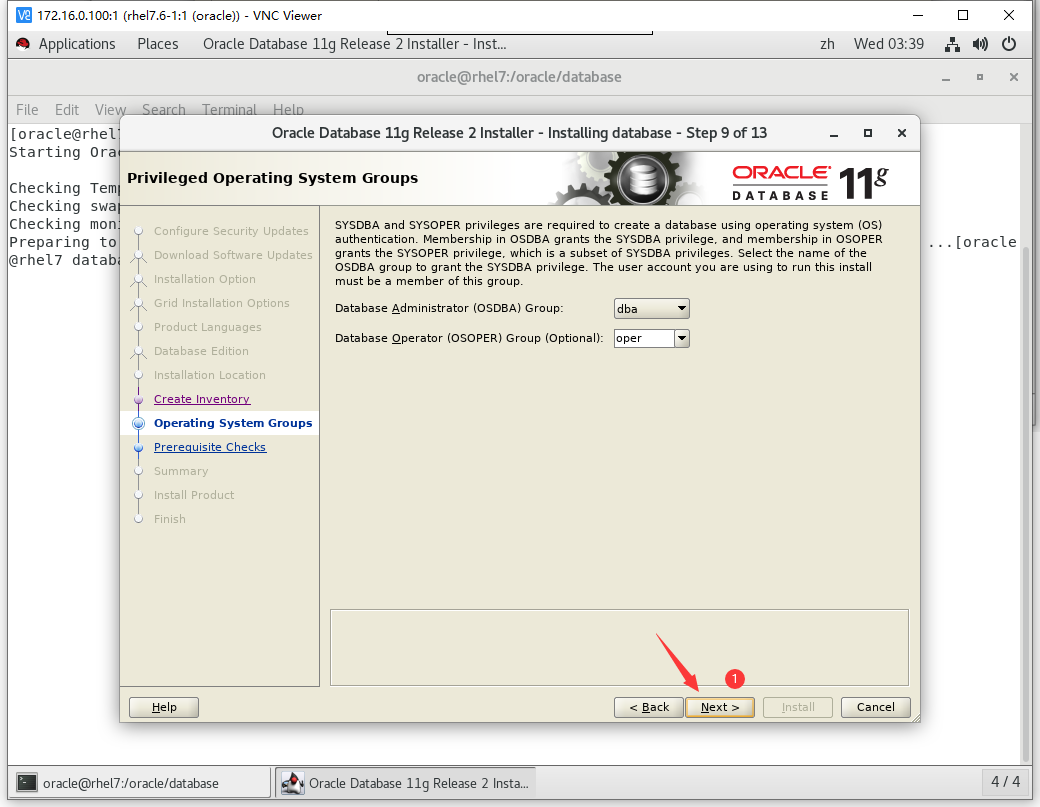
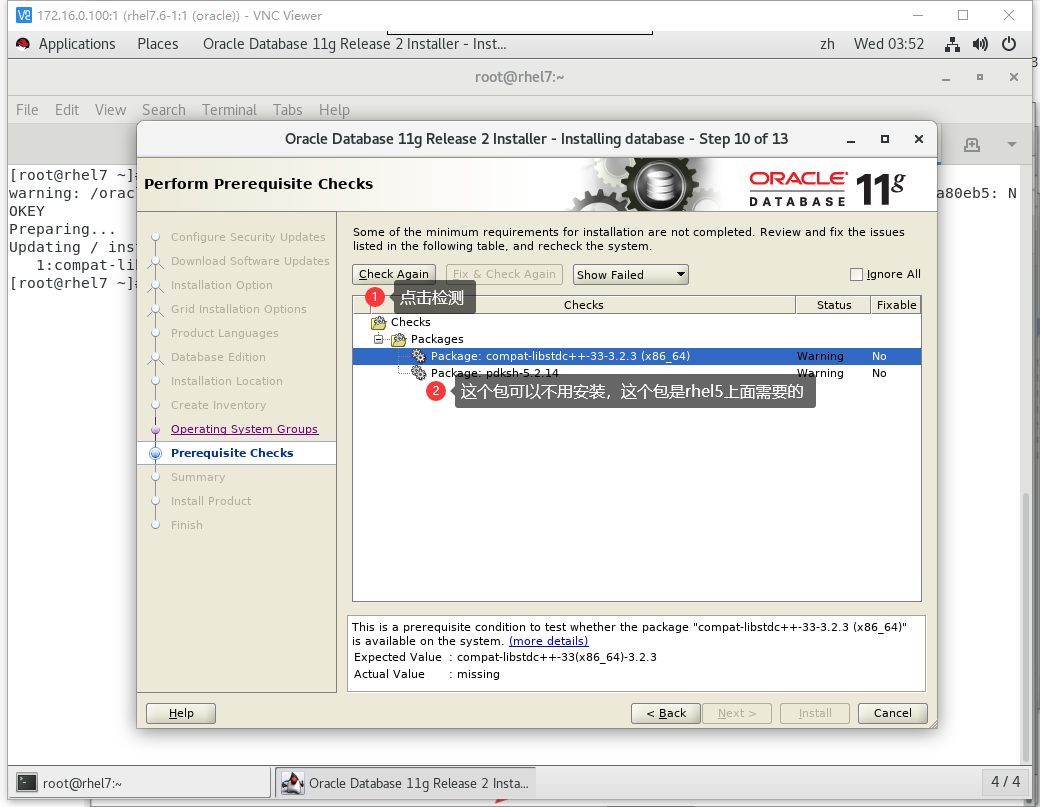
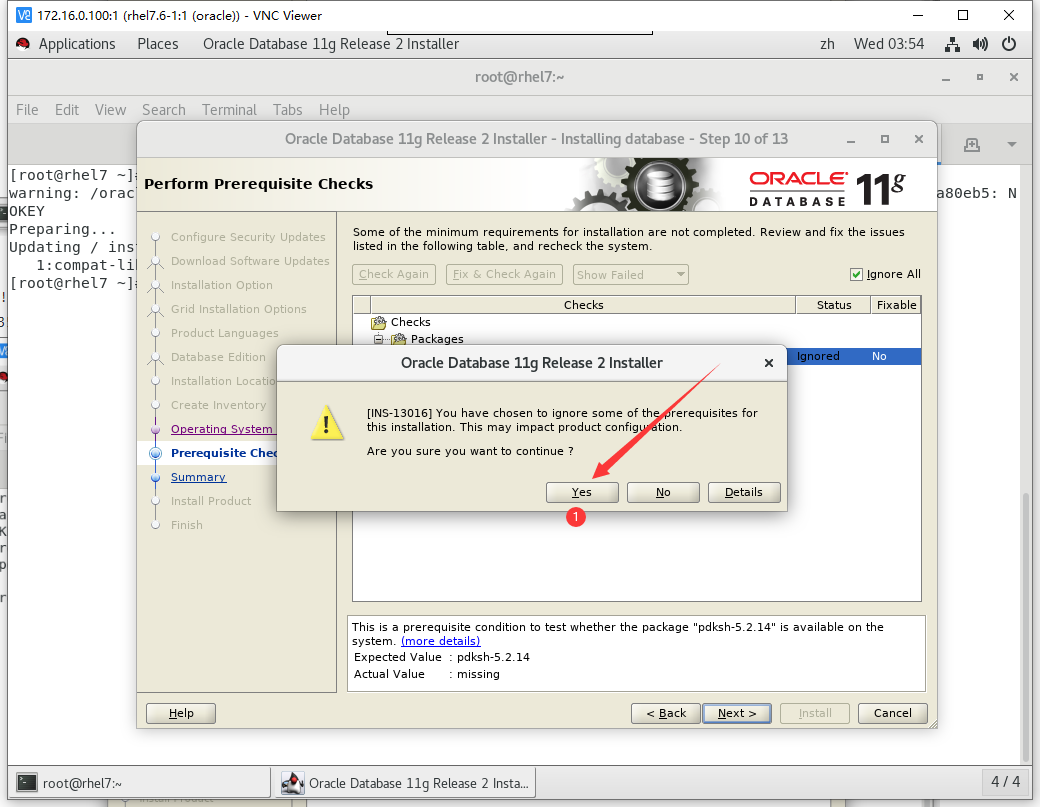
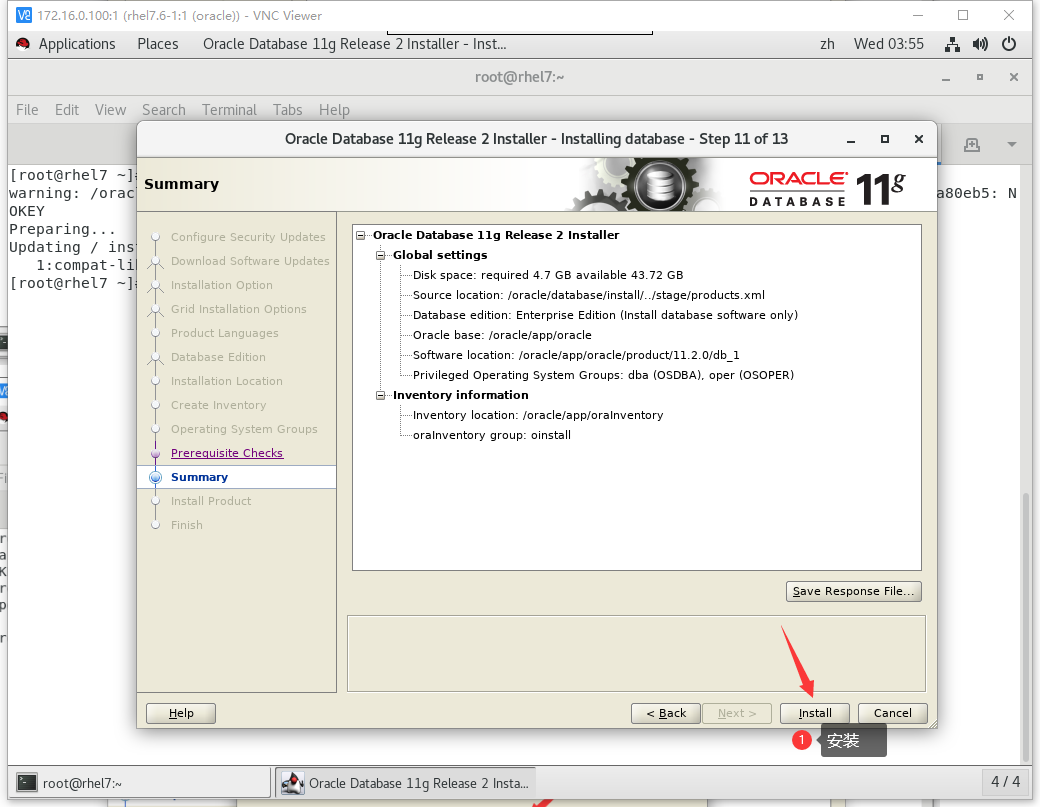
弹出安装对话框
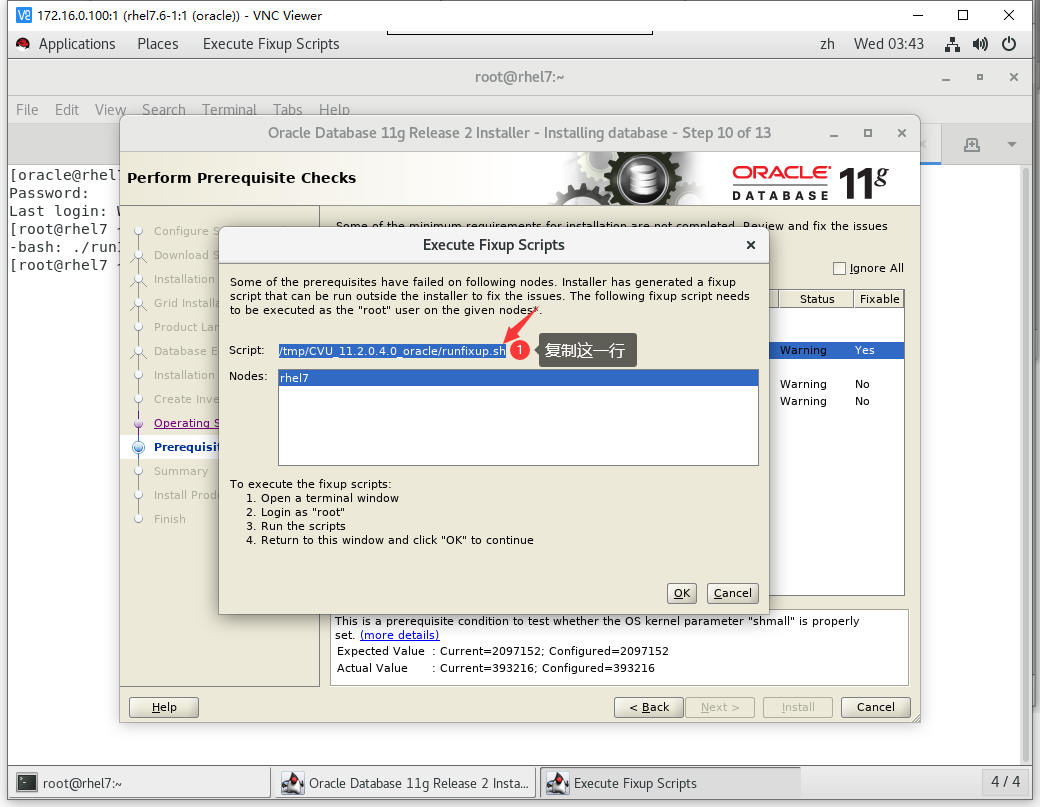
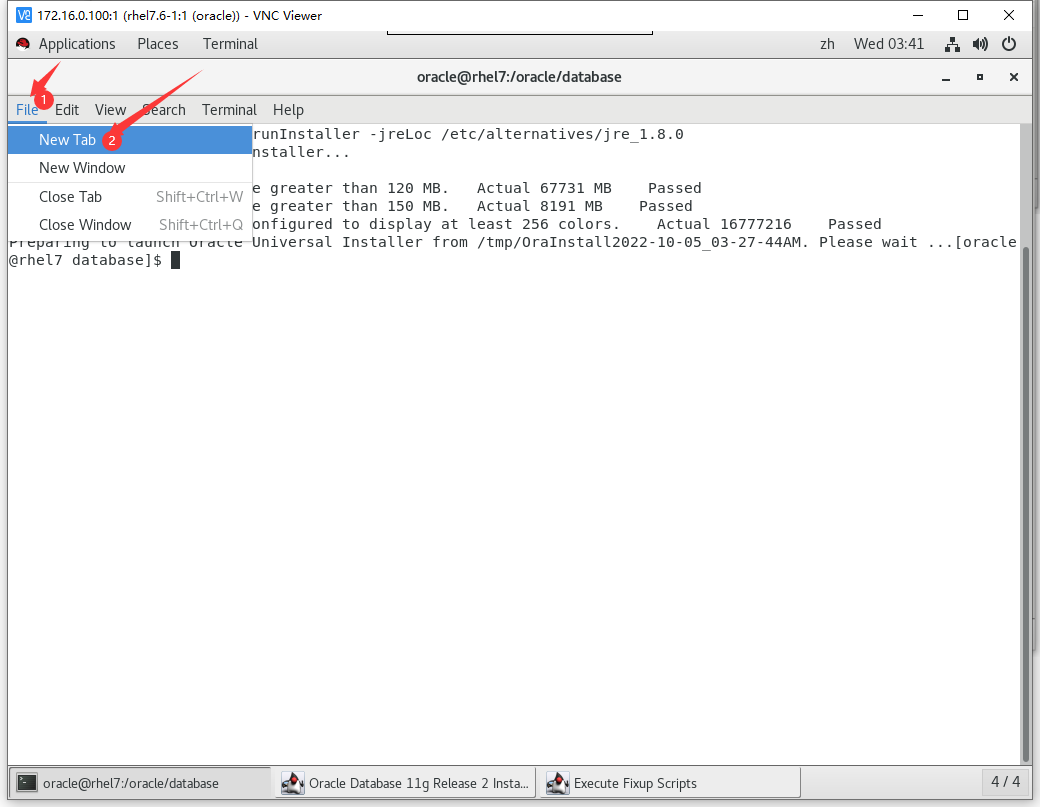
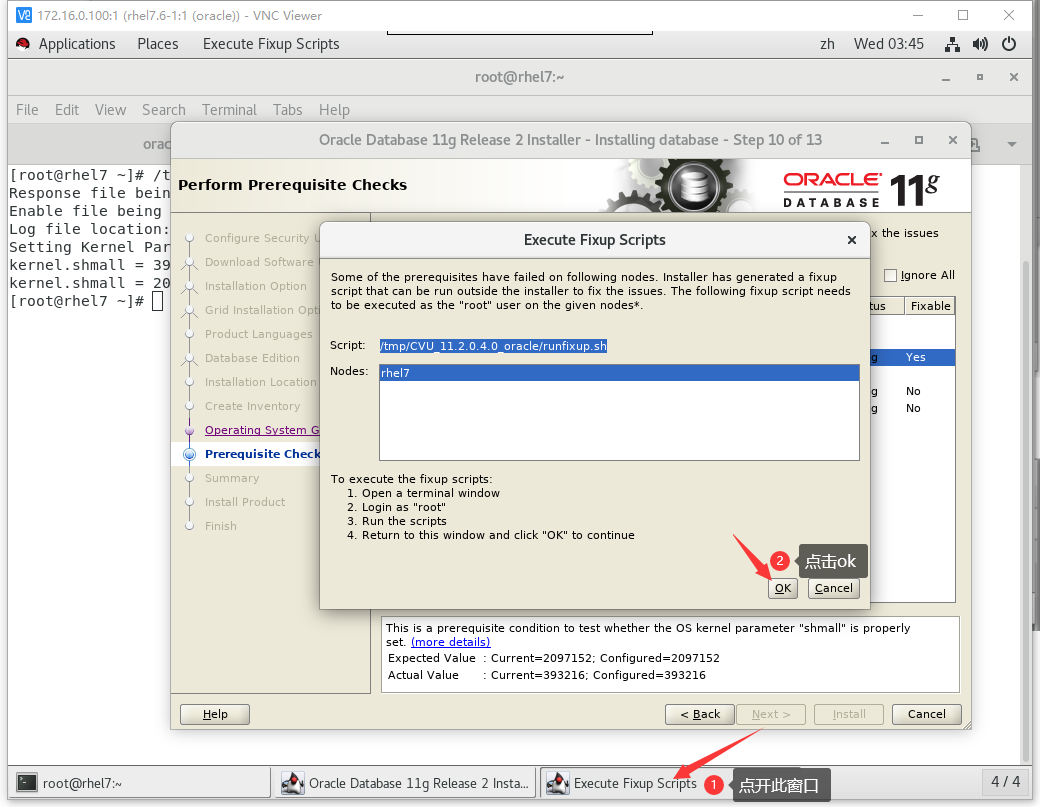
切换到root
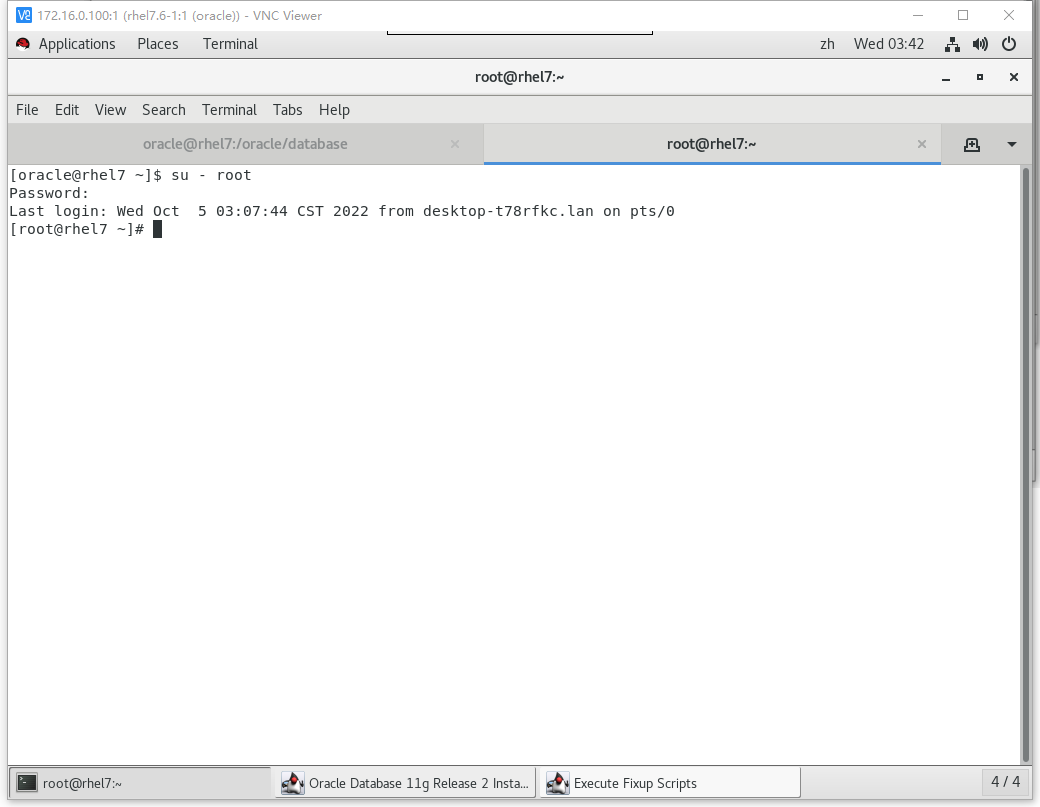
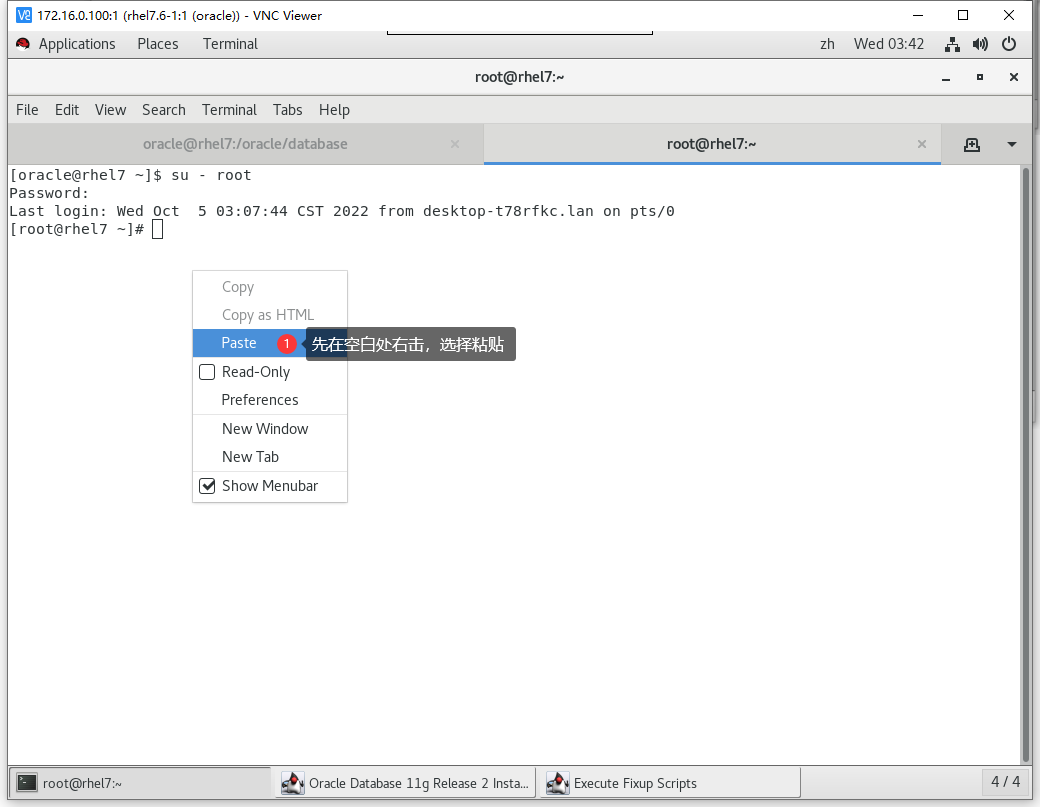
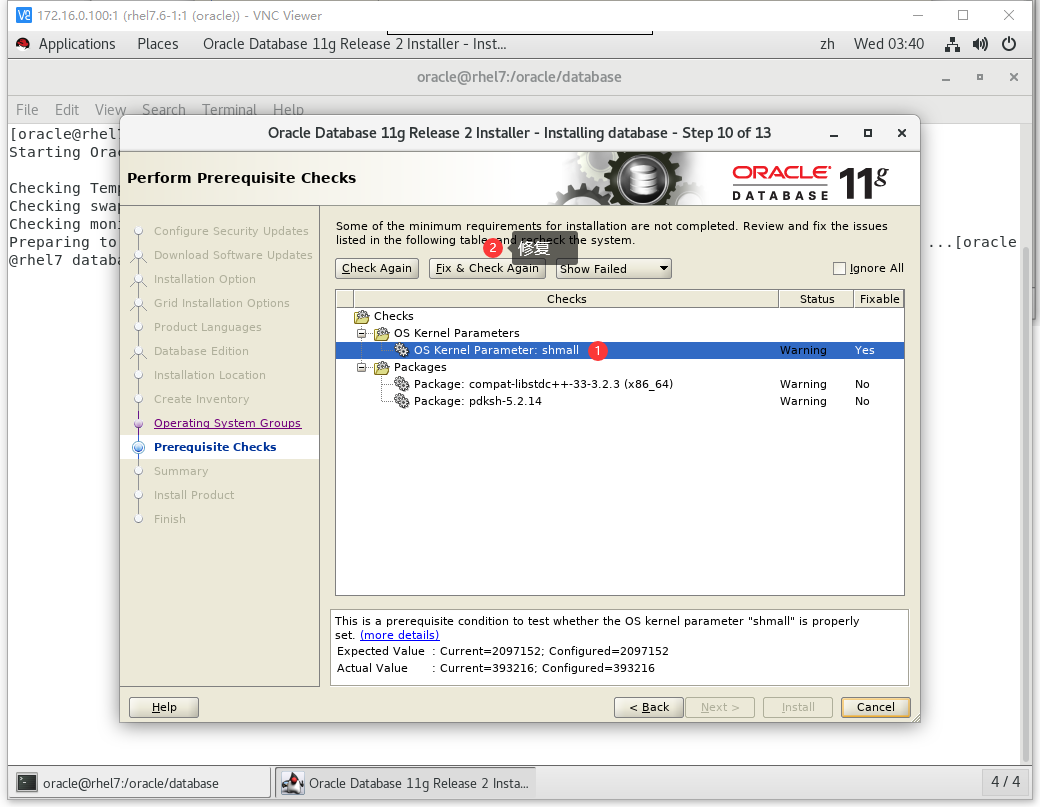
需要修复的命令:
[root@rhel7 ~]# /tmp/CVU_11.2.0.4.0_oracle/runfixup.sh
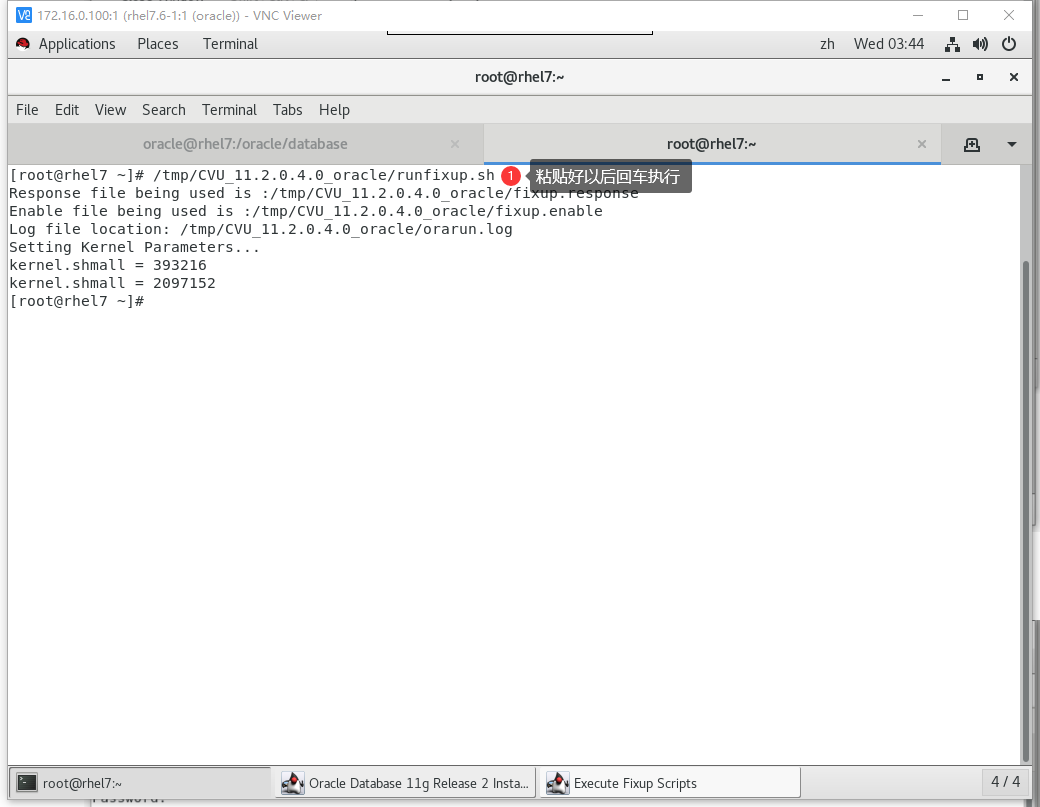
他会重新检测
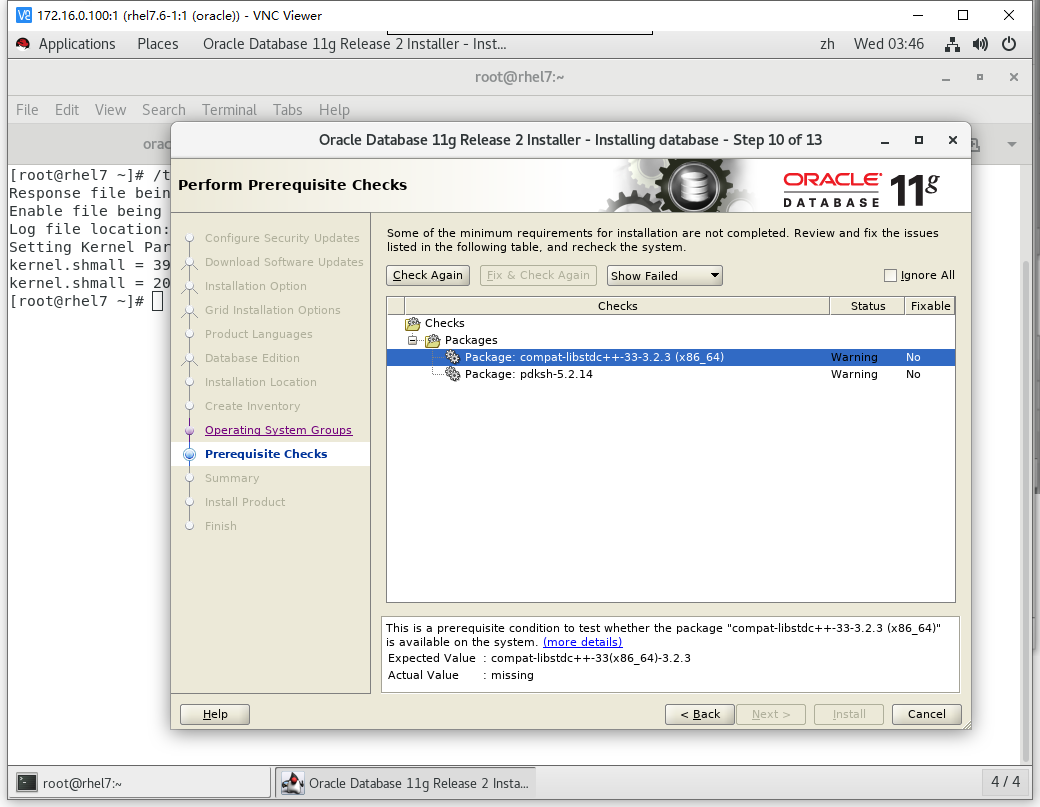
把compat-libstdc++-33-3.2.3-72.el7.x86_64.rpm包上传到服务器上面去,利用winscp
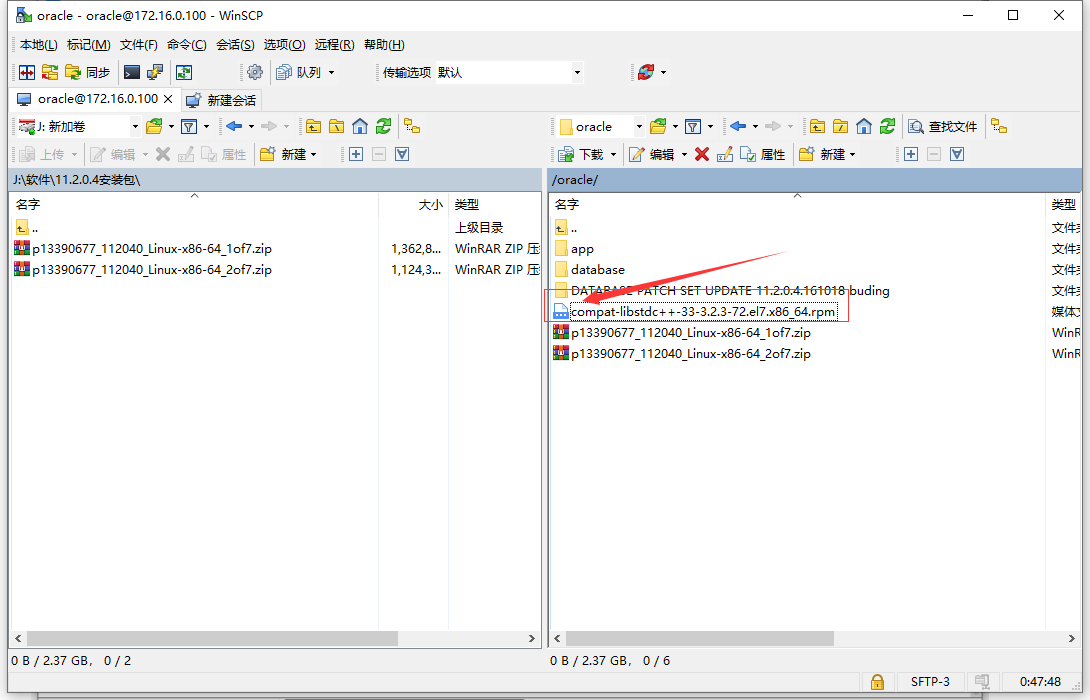
用root用户安装compat-libstdc++-33-3.2.3-72.el7.x86_64.rpm包
[root@rhel7 ~]# rpm -ivh /oracle/compat-libstdc++-33-3.2.3-72.el7.x86_64.rpm
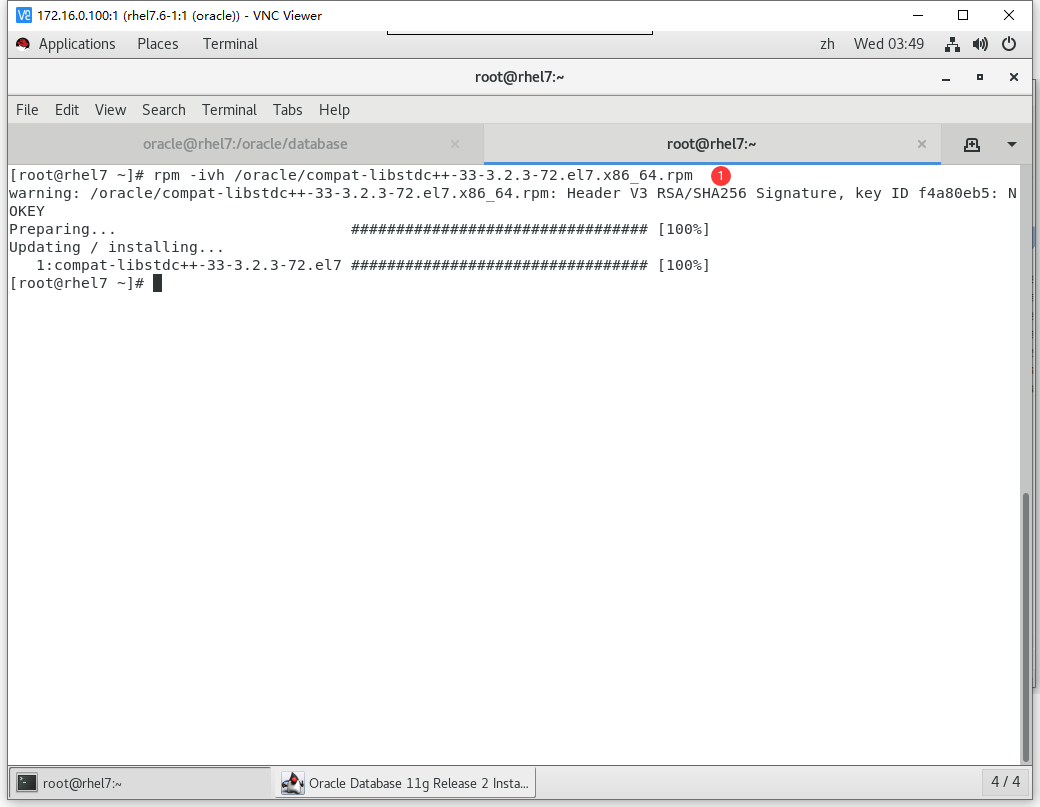
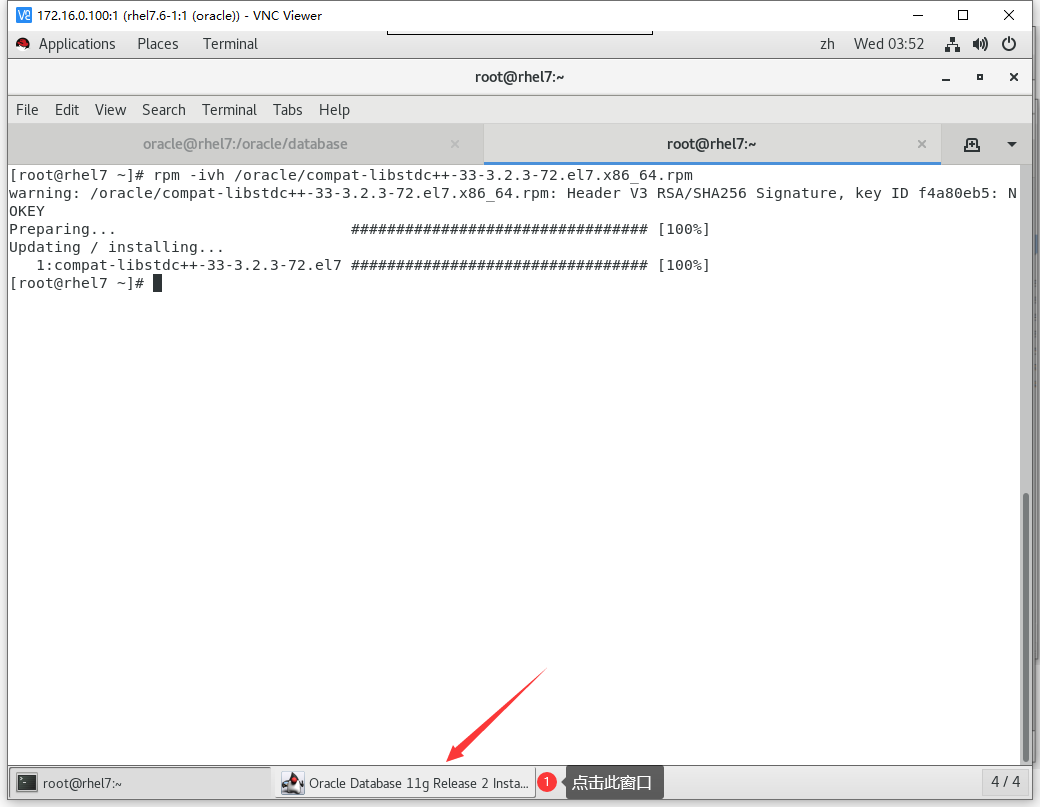

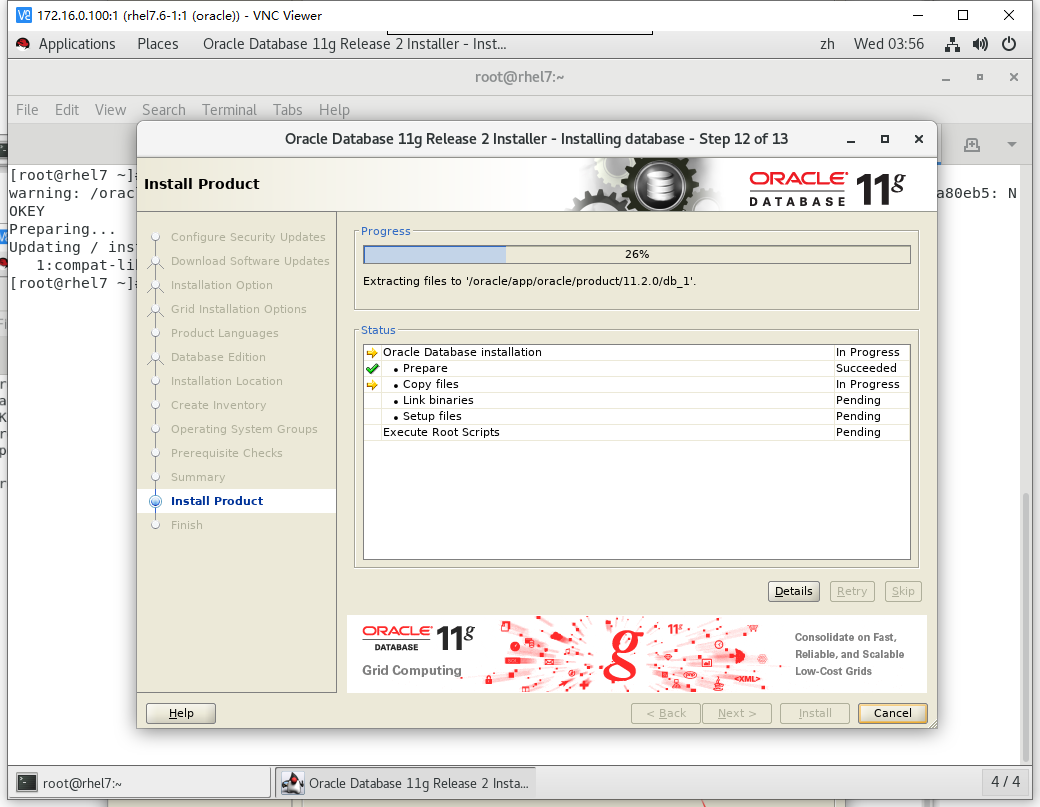
这一步需要等待
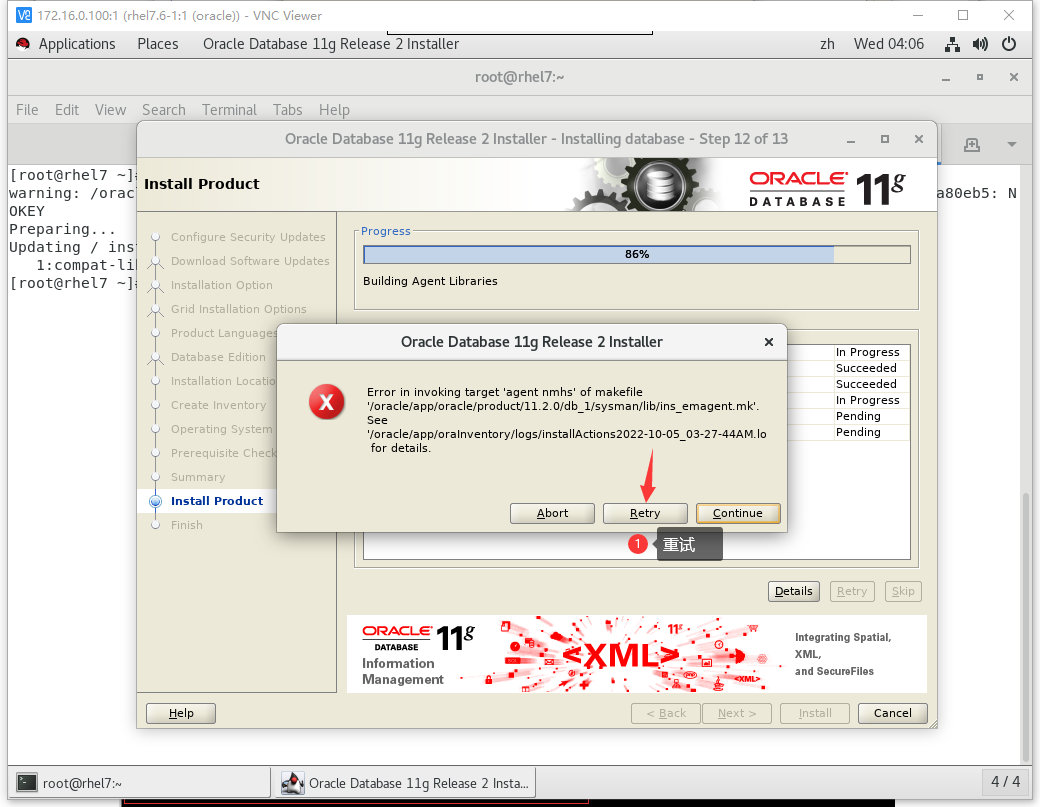
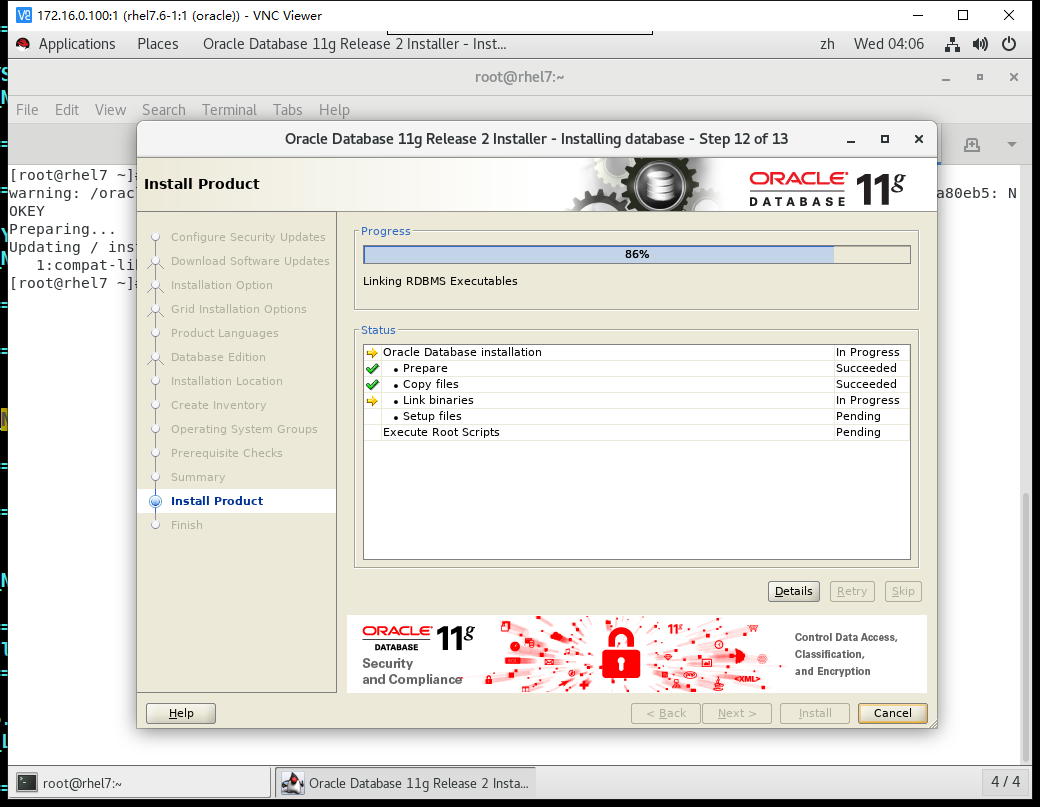
遇见bug,这个问题在rhel6下是没有的
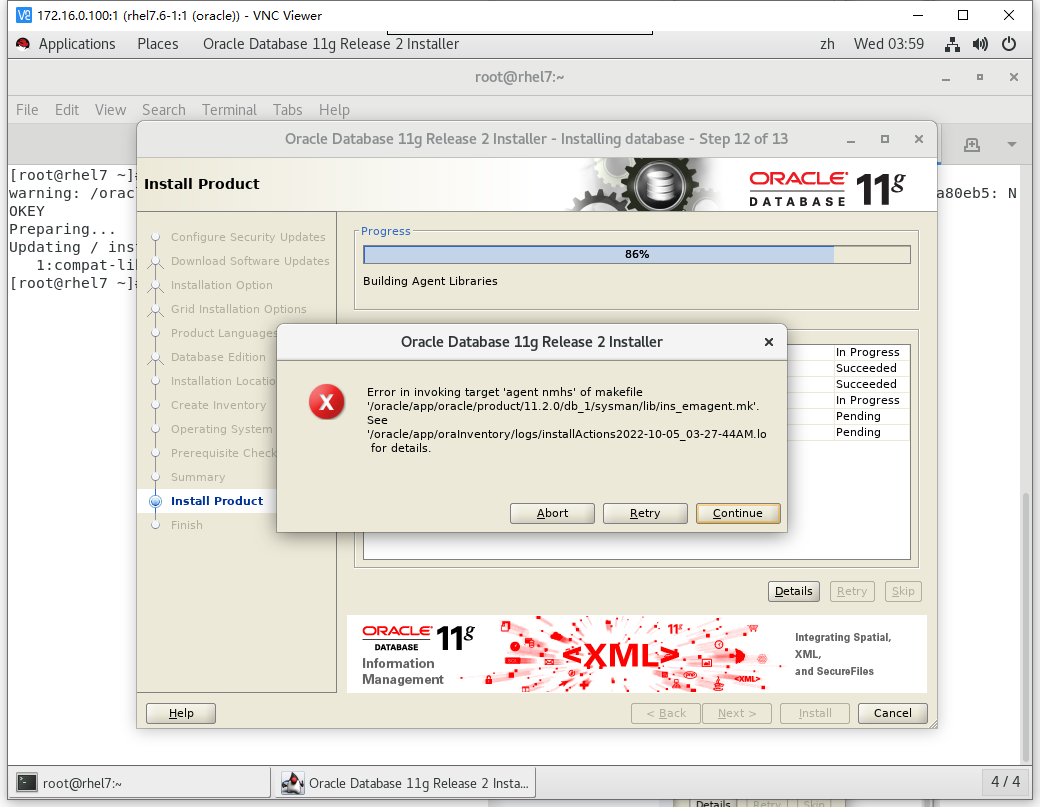
解决办法
进入oracle加目录
[oracle@rhel7 oracle]$ cd $ORACLE_HOME
[oracle@rhel7 db_1]$ cd sysman/lib/

备份文件防止修改错误
[oracle@rhel7 lib]$ cp ins_emagent.mk ins_emagent.mk.bak

修改ins_emagent.mk
[oracle@rhel7 lib]$ vim ins_emagent.mk
搜索NMECTL大约再175行左右
$(MK_EMAGENT_NMECTL)后面添加
改后:
$(MK_EMAGENT_NMECTL) -lnnz11

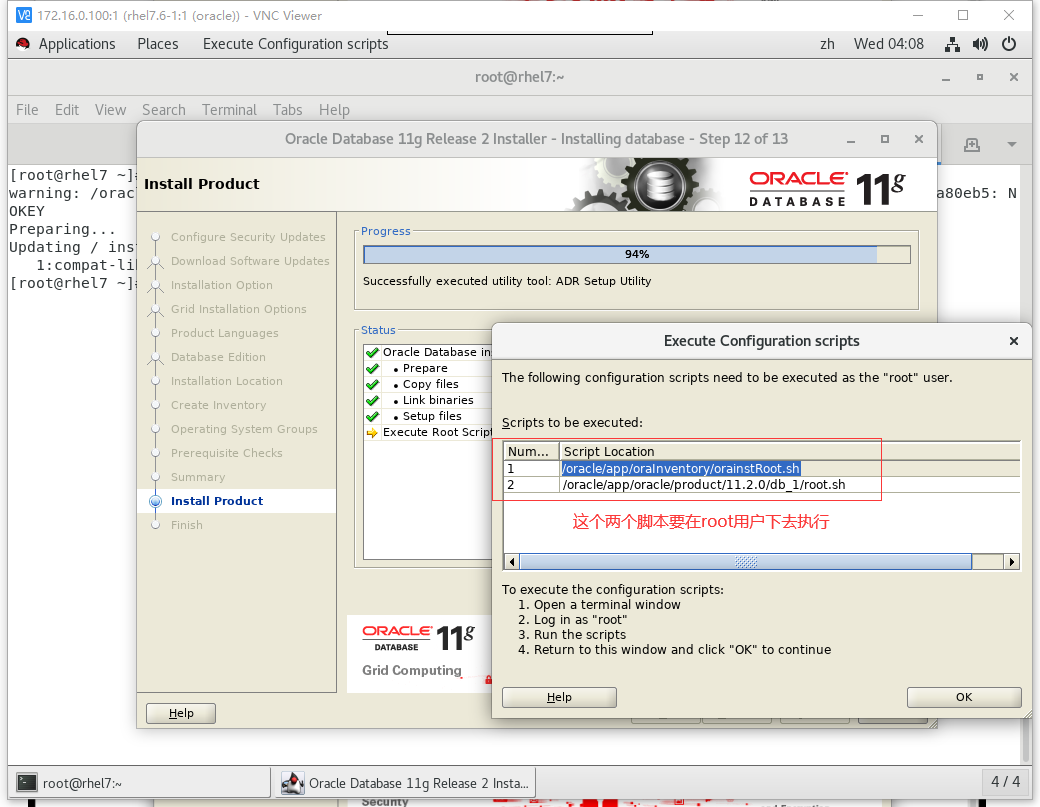
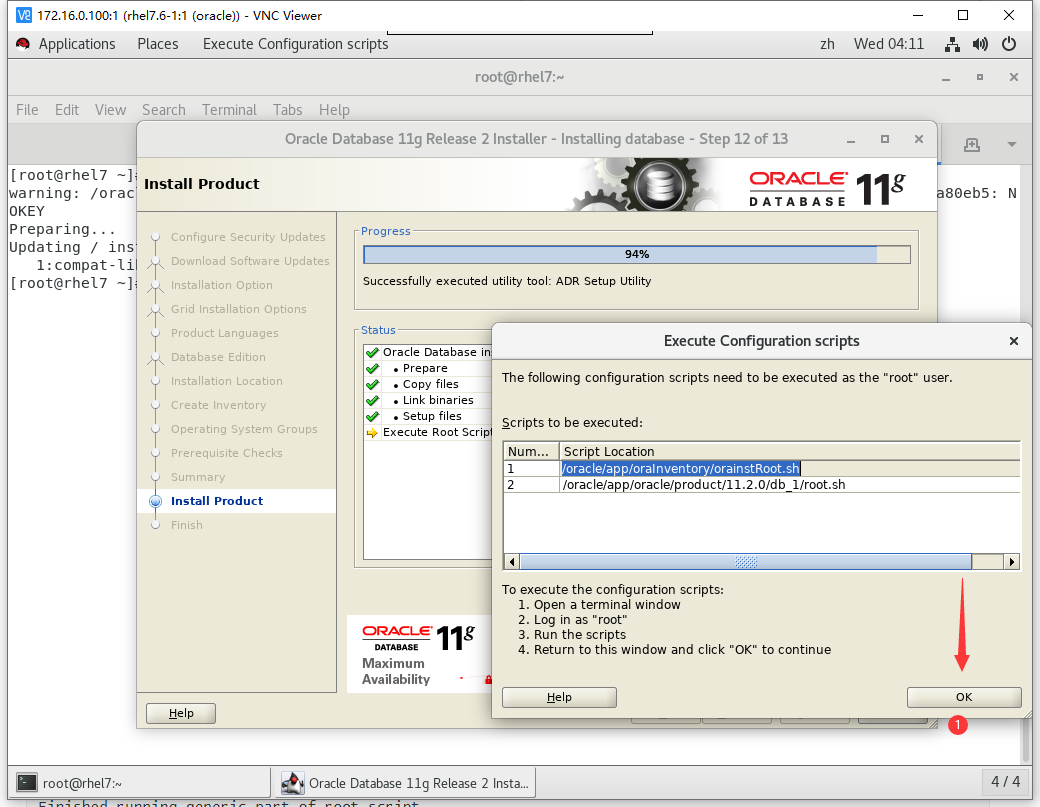
用root执行,第一个脚本
[root@rhel7 ~]# /oracle/app/oraInventory/orainstRoot.sh
Changing permissions of /oracle/app/oraInventory.
Adding read,write permissions for group.
Removing read,write,execute permissions for world.

Changing groupname of /oracle/app/oraInventory to oinstall.
The execution of the script is complete.
用root执行,第二个脚本
[root@rhel7 ~]# /oracle/app/oracle/product/11.2.0/db_1/root.sh
Performing root user operation for Oracle 11g

The following environment variables are set as:
    ORACLE_OWNER= oracle
    ORACLE_HOME=  /oracle/app/oracle/product/11.2.0/db_1

Enter the full pathname of the local bin directory: [/usr/local/bin]: 回车
   Copying dbhome to /usr/local/bin ...
   Copying oraenv to /usr/local/bin ...
   Copying coraenv to /usr/local/bin ...


Creating /etc/oratab file...
Entries will be added to the /etc/oratab file as needed by
Database Configuration Assistant when a database is created
Finished running generic part of root script.
Now product-specific root actions will be performed.
Finished product-specific root actions.

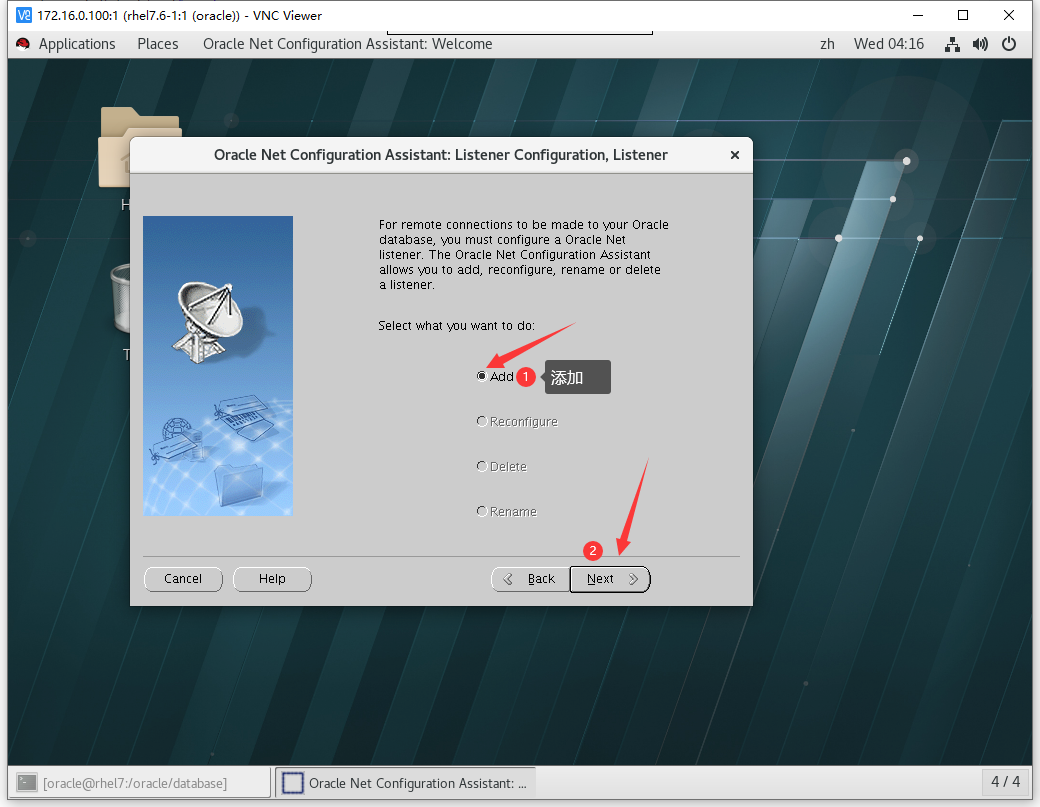

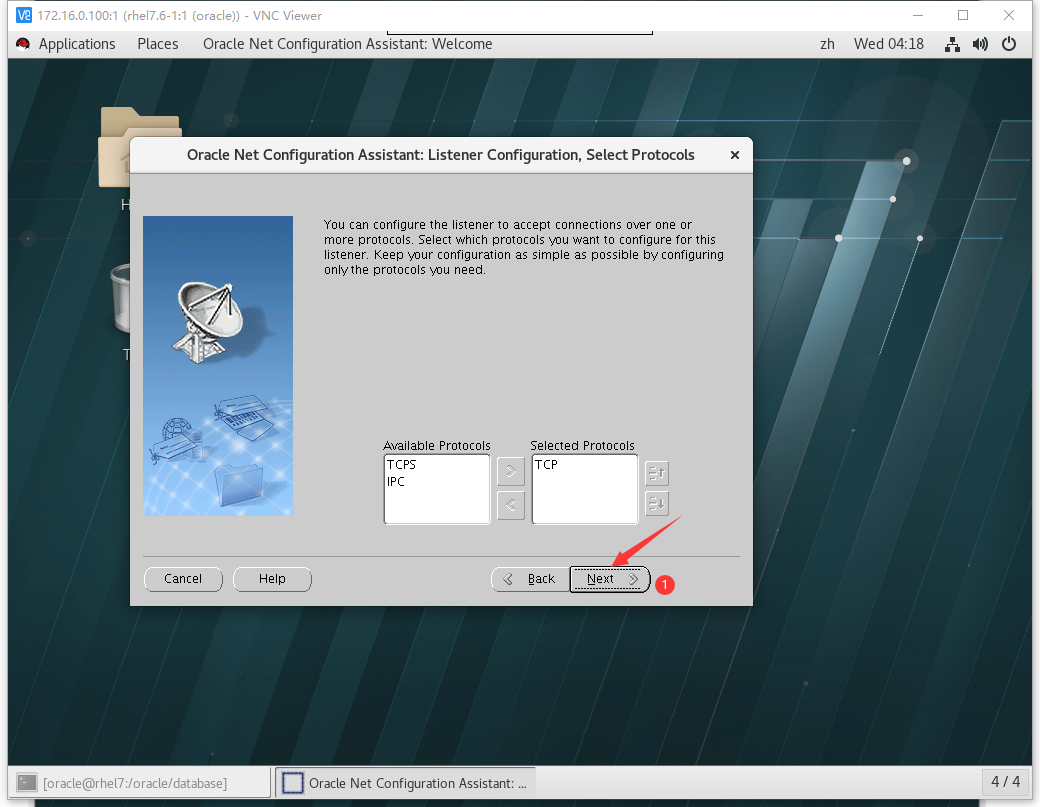

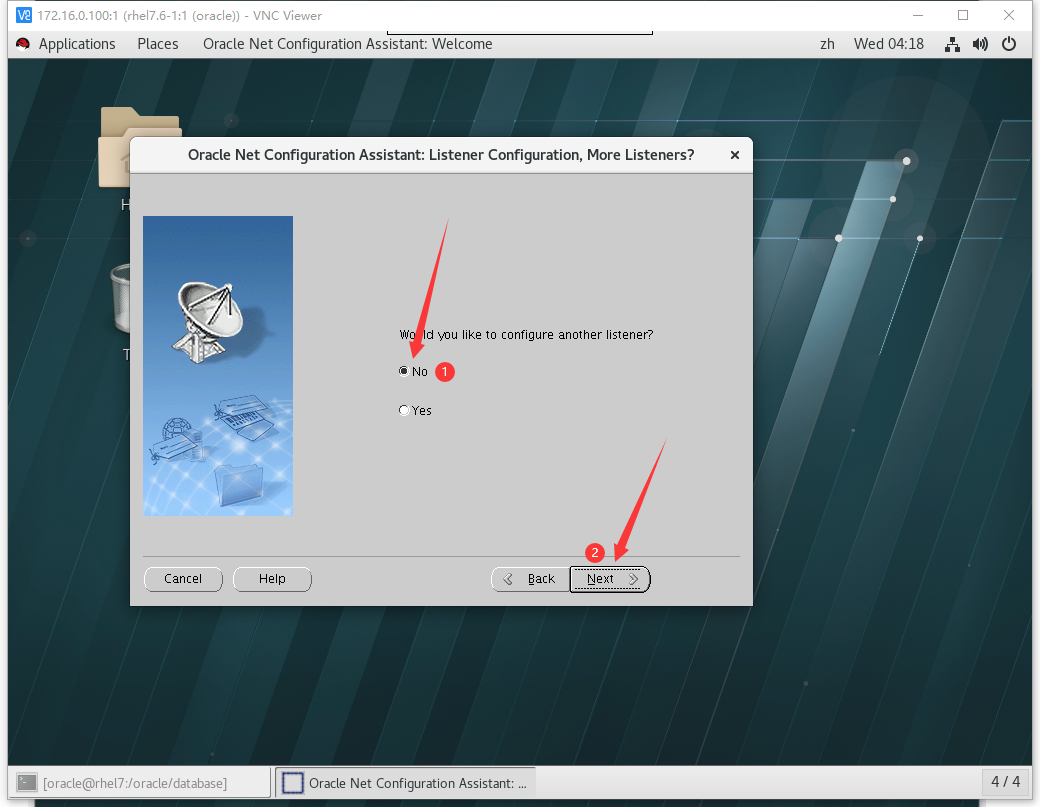
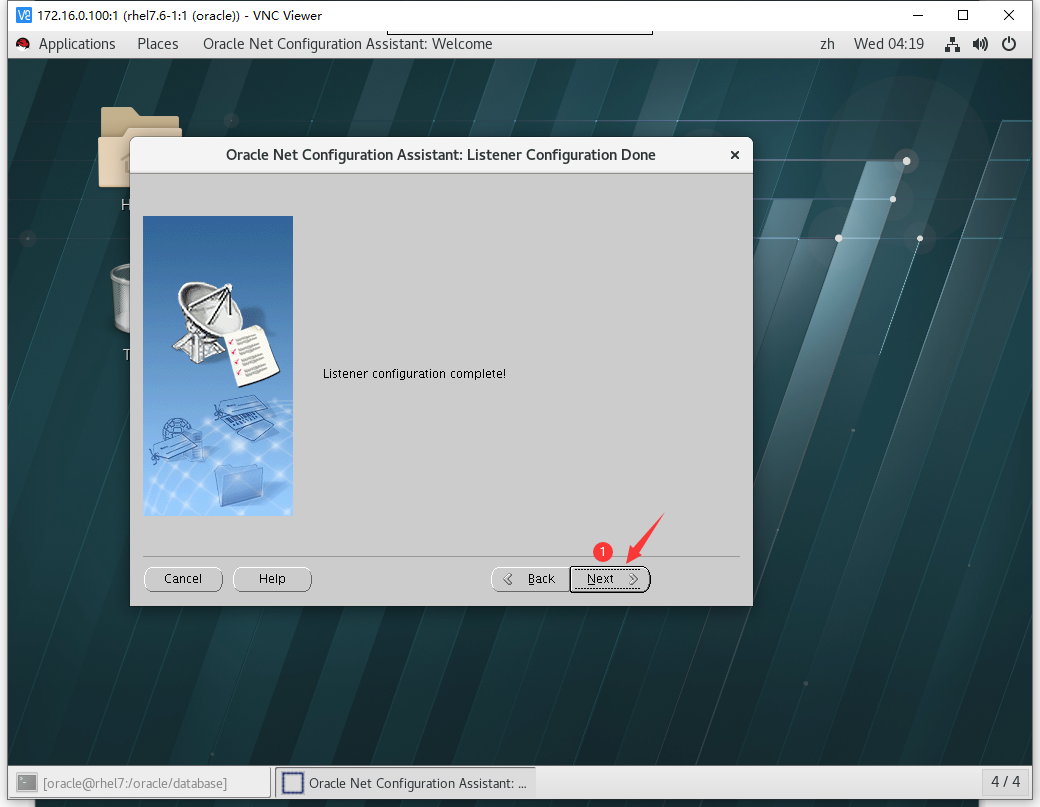

看一下监听状态
[oracle@rhel7 ~]$ lsnrctl status

LSNRCTL for Linux: Version 11.2.0.4.0 - Production on 05-OCT-2022 04:21:17

Copyright (c) 1991, 2013, Oracle.  All rights reserved.

Connecting to (DESCRIPTION=(ADDRESS=(PROTOCOL=TCP)(HOST=rhel7.6-1)(PORT=1521)))
STATUS of the LISTENER
------------------------
Alias                     LISTENER
Version                   TNSLSNR for Linux: Version 11.2.0.4.0 - Production
Start Date                05-OCT-2022 04:19:08
Uptime                    0 days 0 hr. 2 min. 8 sec
Trace Level               off
Security                  ON: Local OS Authentication
SNMP                      OFF
Listener Parameter File   /oracle/app/oracle/product/11.2.0/db_1/network/admin/listener.ora
Listener Log File         /oracle/app/oracle/diag/tnslsnr/rhel7/listener/alert/log.xml
Listening Endpoints Summary...
  (DESCRIPTION=(ADDRESS=(PROTOCOL=tcp)(HOST=rhel7.6-1)(PORT=1521)))
  (DESCRIPTION=(ADDRESS=(PROTOCOL=ipc)(KEY=EXTPROC1521)))
The listener supports no services
The command completed successfully
停止监听
[oracle@rhel7 ~]$ lsnrctl stop

LSNRCTL for Linux: Version 11.2.0.4.0 - Production on 05-OCT-2022 04:22:47

Copyright (c) 1991, 2013, Oracle.  All rights reserved.

Connecting to (DESCRIPTION=(ADDRESS=(PROTOCOL=TCP)(HOST=rhel7.6-1)(PORT=1521)))
The command completed successfully
启动监听
[oracle@rhel7 ~]$ lsnrctl start

LSNRCTL for Linux: Version 11.2.0.4.0 - Production on 05-OCT-2022 04:23:11

Copyright (c) 1991, 2013, Oracle.  All rights reserved.

Starting /oracle/app/oracle/product/11.2.0/db_1/bin/tnslsnr: please wait...

TNSLSNR for Linux: Version 11.2.0.4.0 - Production
System parameter file is /oracle/app/oracle/product/11.2.0/db_1/network/admin/listener.ora
Log messages written to /oracle/app/oracle/diag/tnslsnr/rhel7/listener/alert/log.xml
Listening on: (DESCRIPTION=(ADDRESS=(PROTOCOL=tcp)(HOST=rhel7.6-1)(PORT=1521)))
Listening on: (DESCRIPTION=(ADDRESS=(PROTOCOL=ipc)(KEY=EXTPROC1521)))

Connecting to (DESCRIPTION=(ADDRESS=(PROTOCOL=TCP)(HOST=rhel7.6-1)(PORT=1521)))
STATUS of the LISTENER
------------------------
Alias                     LISTENER
Version                   TNSLSNR for Linux: Version 11.2.0.4.0 - Production
Start Date                05-OCT-2022 04:23:11
Uptime                    0 days 0 hr. 0 min. 0 sec
Trace Level               off
Security                  ON: Local OS Authentication
SNMP                      OFF
Listener Parameter File   /oracle/app/oracle/product/11.2.0/db_1/network/admin/listener.ora
Listener Log File         /oracle/app/oracle/diag/tnslsnr/rhel7/listener/alert/log.xml
Listening Endpoints Summary...
  (DESCRIPTION=(ADDRESS=(PROTOCOL=tcp)(HOST=rhel7.6-1)(PORT=1521)))
  (DESCRIPTION=(ADDRESS=(PROTOCOL=ipc)(KEY=EXTPROC1521)))
The listener supports no services
The command completed successfully
查看端口,用root用户
[root@rhel7 ~]# netstat -lantup|grep 1521
tcp6       0      0 :::1521                 :::*                    LISTEN      20734/tnslsnr
tcp6       0      0 172.16.0.100:1521       172.16.0.232:35876      TIME_WAIT   -
tcp6       0      0 172.16.0.100:1521       172.16.0.232:35875      TIME_WAIT   -
tcp6       0      0 fe80::fb8a:9a50:3e:1521 fe80::fb8a:9a50:3:42440 TIME_WAIT   -
tcp6       0      0 172.16.0.100:1521       172.16.0.232:35884      TIME_WAIT   -
tcp6       0      0 172.16.0.100:1521       172.16.0.232:35886      TIME_WAIT   -
tcp6       0      0 172.16.0.100:1521       172.16.0.232:35873      TIME_WAIT   -
tcp6       0      0 172.16.0.100:1521       172.16.0.232:35885      TIME_WAIT   -
tcp6       0      0 172.16.0.100:1521       172.16.0.232:35874      TIME_WAIT