Ububtu2004安装zabbix-server5.0
官网:
https://www.zabbix.com/cn/download?zabbix=5.0&os_distribution=ubuntu&os_version=20.04_focal&db=mysql&ws=apache
初始化配置:
# sed -i 's/#UseDNS yes/UseDNS no/g' /etc/ssh/sshd_config
# sed -i 's#GSSAPIAuthentication yes#GSSAPIAuthentication no#g' /etc/ssh/sshd_config
cat >> /etc/security/limits.conf << EOF
* soft nofile 65535
* hard nofile 65535
EOF
cat >> /etc/sysctl.conf << EOF
net.ipv4.tcp_syncookies = 1
net.ipv4.tcp_max_tw_buckets = 20480
net.ipv4.tcp_max_syn_backlog = 20480
net.core.netdev_max_backlog = 262144
net.ipv4.tcp_fin_timeout = 20
EOF
# hostnamectl set-hostname zabbix-server
配置阿里云官方镜像站
vim /etc/apt/sources.list
##把原有的注释掉
deb http://mirrors.aliyun.com/ubuntu/ focal main restricted universe multiverse
deb-src http://mirrors.aliyun.com/ubuntu/ focal main restricted universe multiverse

deb http://mirrors.aliyun.com/ubuntu/ focal-security main restricted universe multiverse
deb-src http://mirrors.aliyun.com/ubuntu/ focal-security main restricted universe multiverse

deb http://mirrors.aliyun.com/ubuntu/ focal-updates main restricted universe multiverse
deb-src http://mirrors.aliyun.com/ubuntu/ focal-updates main restricted universe multiverse

# deb http://mirrors.aliyun.com/ubuntu/ focal-proposed main restricted universe multiverse
# deb-src http://mirrors.aliyun.com/ubuntu/ focal-proposed main restricted universe multiverse

deb http://mirrors.aliyun.com/ubuntu/ focal-backports main restricted universe multiverse
deb-src http://mirrors.aliyun.com/ubuntu/ focal-backports main restricted universe multiverse
安装系统常用软件包
apt update
apt -y purge ufw lxd lxd-client lxcfs liblxc-common
apt -y install iproute2 ntpdate tcpdump telnet traceroute nfs-kernel-server nfs-common lrzsz tree openssl libssl-dev libpcre3 libpcre3-dev zlib1g-dev  gcc openssh-server  iotop unzip zip
安装zabbix-server5.0源
wget https://repo.zabbix.com/zabbix/5.0/ubuntu/pool/main/z/zabbix-release/zabbix-release_5.0-1+focal_all.deb
dpkg -i zabbix-release_5.0-1+focal_all.deb
apt update
安装zabbix-server和zabbix-agent
apt install zabbix-server-mysql zabbix-frontend-php zabbix-apache-conf zabbix-agent zabbix-get -y
安装mysql-server
apt install lrzsz mysql-server -y
修改mysql的配置文件
vim /etc/mysql/mysql.conf.d/mysqld.cnf
原:
bind-address            = 127.0.0.1
mysqlx-bind-address     = 127.0.0.1

改后
bind-address            = 0.0.0.0
mysqlx-bind-address     = 0.0.0.0
重启mysql
systemctl enable mysql
systemctl restart mysql
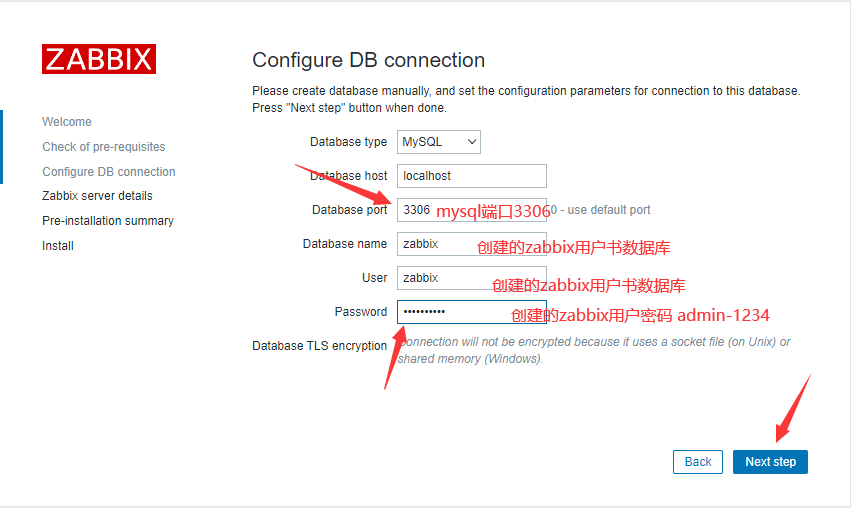
进入mysql,创建zabbix,并授权设置密码
# mysql

mysql> create database zabbix character set utf8 collate utf8_bin;
mysql> create user zabbix@localhost identified by 'admin-1234';
mysql> grant all privileges on zabbix.* to zabbix@localhost;
mysql> quit;
导入初始架构和数据,系统将提示您输入新创建的密码。
zcat /usr/share/doc/zabbix-server-mysql/create.sql.gz |mysql -uzabbix -padmin-1234 zabbix
修改zabbix配置文件的DBname的密码为admin-1234
sed -i 's/# DBPassword=/DBPassword=admin-1234/g' /etc/zabbix/zabbix_server.conf
设置时区为亚洲上海
sed -i 's$# php_value date.timezone Europe/Riga$php_value date.timezone Asia/Shanghai$g' /etc/zabbix/apache.conf
重启zabbix和apache
systemctl restart zabbix-server zabbix-agent apache2
把zabbix和apache设置为开机自启动
systemctl enable zabbix-server zabbix-agent apache2
安装中文字体方便zabbix可以修改成中文显示
apt -y install language-pack-zh-hans
重启apache
systemctl restart apache2
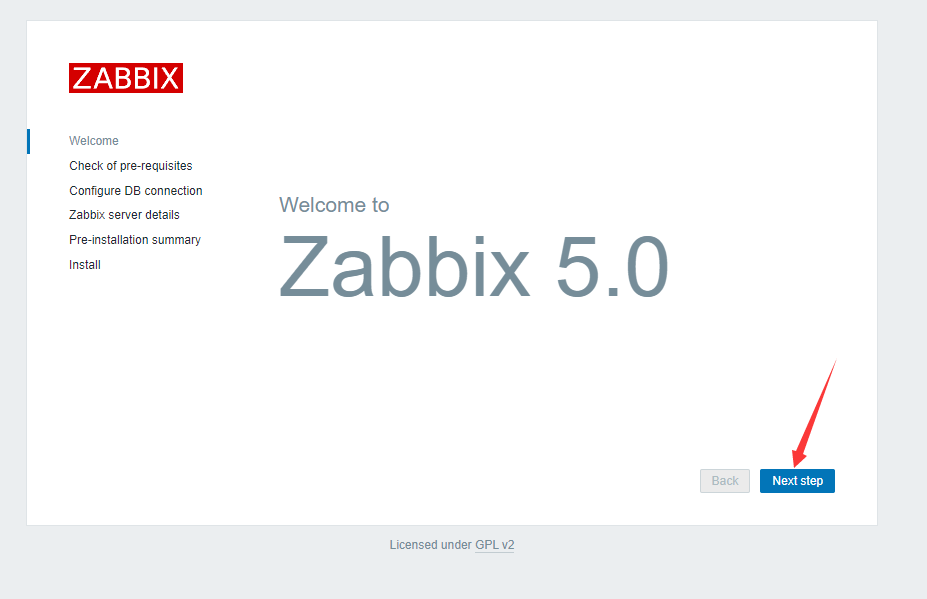
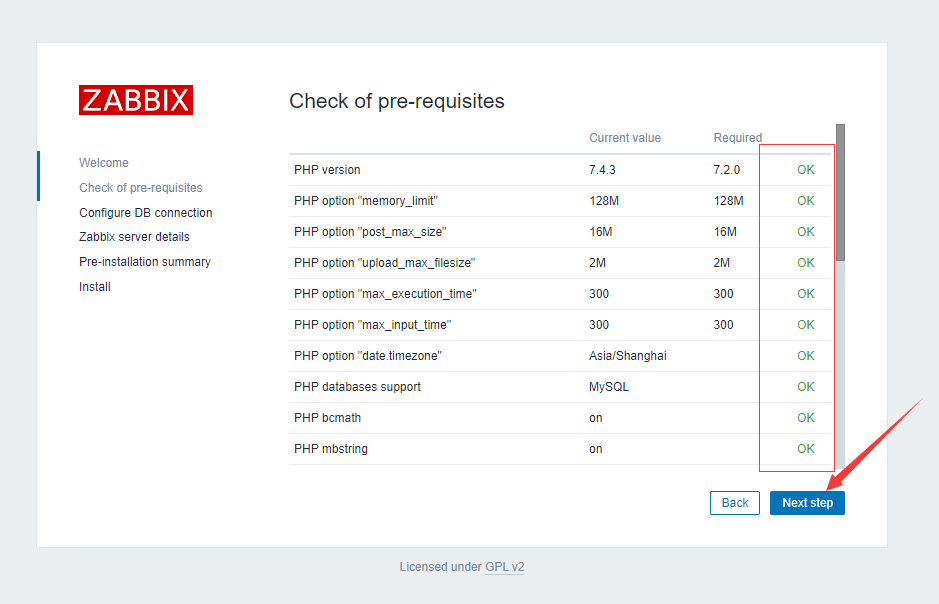
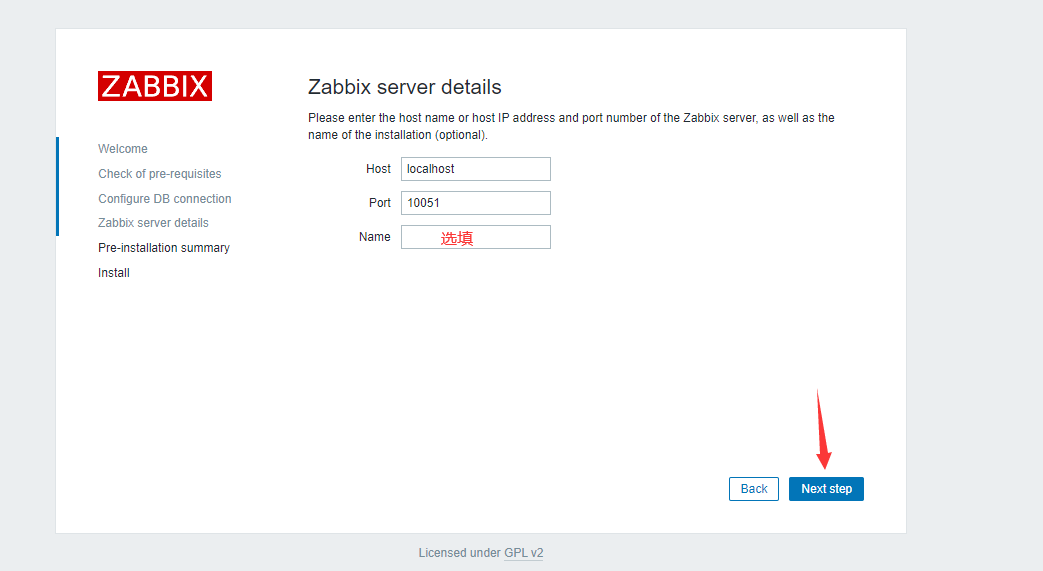
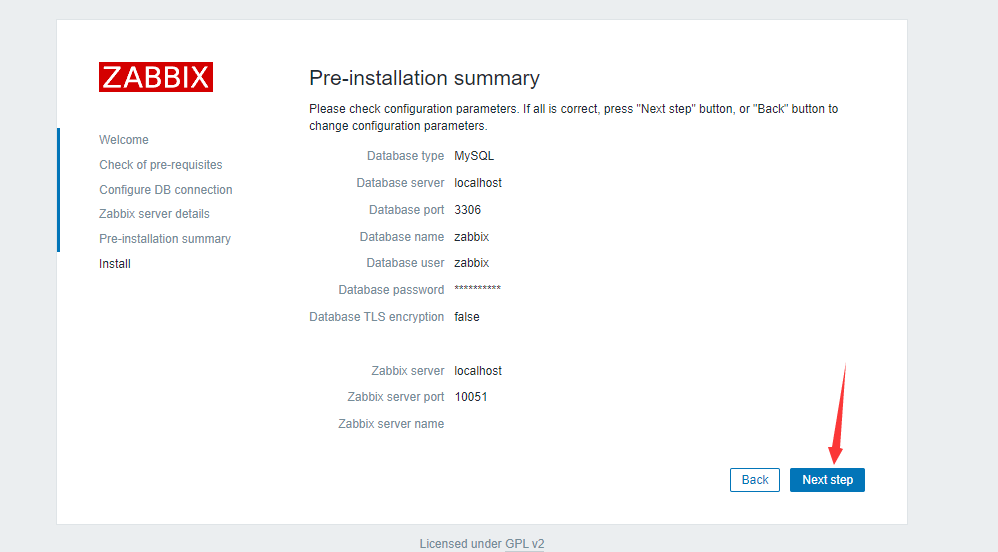
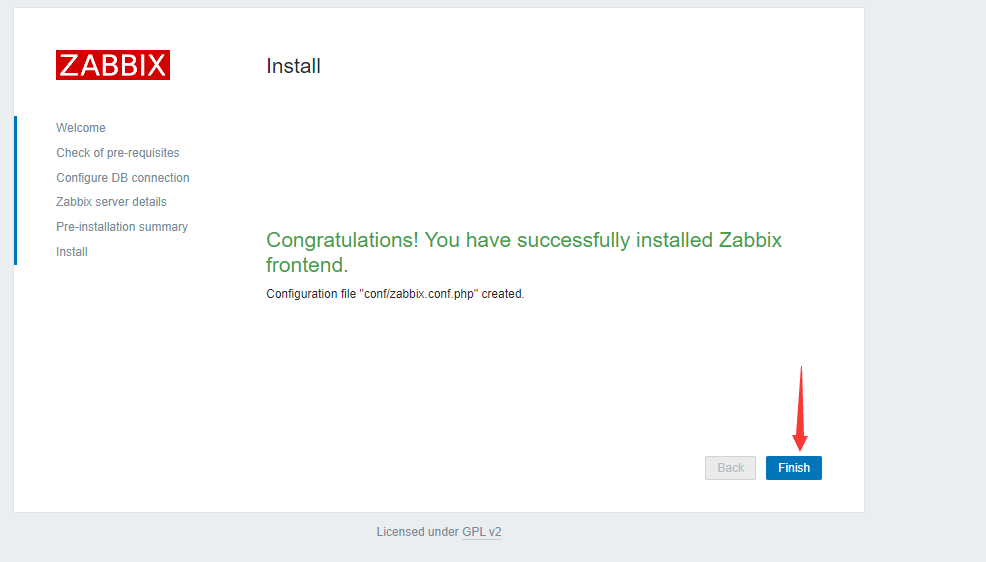
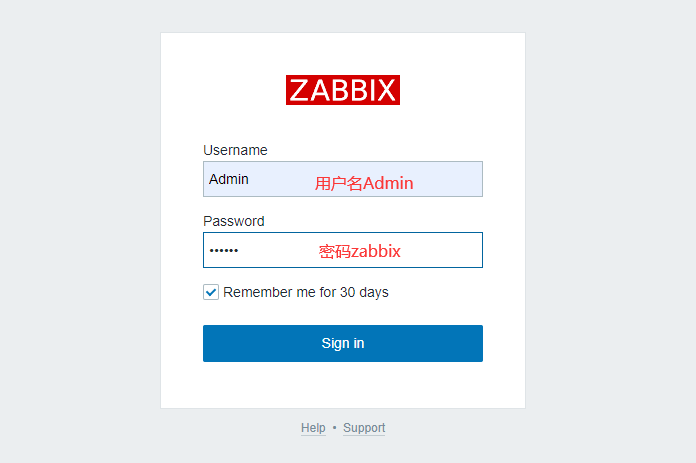
浏览器访问zabbix
http://10.0.0.43/zabbix
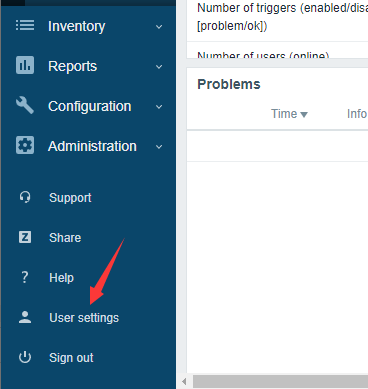
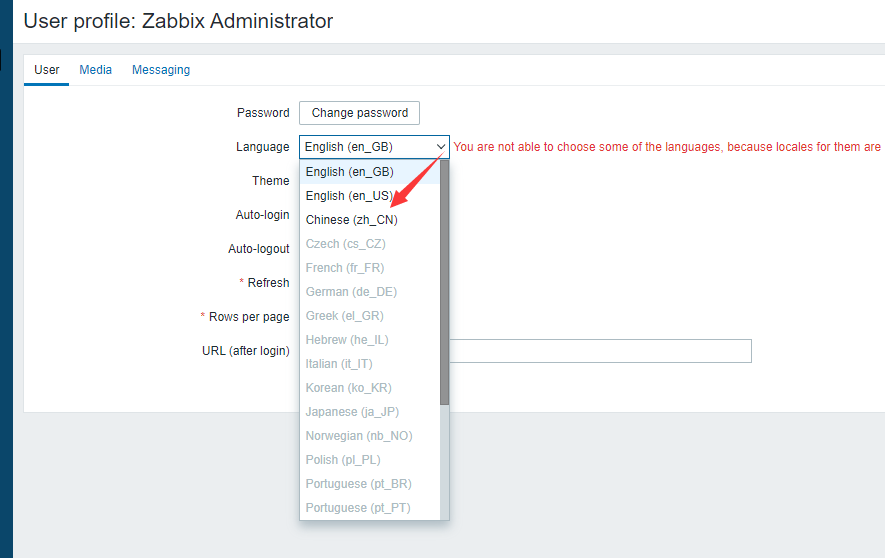
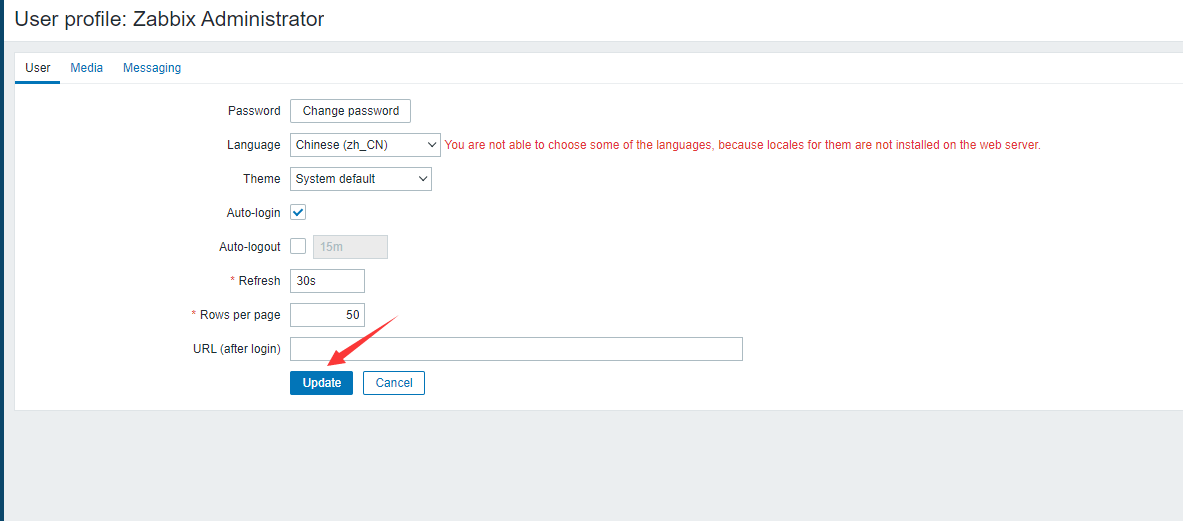
修改成中文
