再Centos7.6-1这台主机上面安装memcached服务
[root@centos7 ~]# yum install memcached nc telnet -y
启动并设置为开机自启动
[root@centos7 ~]# systemctl enable memcached.service --now
可以利用telnet命令来查看memcached服务状态信心
[root@centos7 ~]# telnet 127.0.0.1 11211
Trying 127.0.0.1...
Connected to 127.0.0.1.
Escape character is '^]'.
命令查看状态
stats
返回结果:
STAT pid 14383
STAT uptime 208
STAT time 1659497487
STAT version 1.5.6 Ubuntu
STAT libevent 2.1.8-stable
STAT pointer_size 64
STAT rusage_user 0.000000
STAT rusage_system 0.048955
STAT max_connections 1024
STAT curr_connections 1
STAT total_connections 2
STAT rejected_connections 0
STAT connection_structures 2
STAT reserved_fds 20
STAT cmd_get 0
STAT cmd_set 0
STAT cmd_flush 0
STAT cmd_touch 0
STAT get_hits 0
STAT get_misses 0
STAT get_expired 0
STAT get_flushed 0
STAT delete_misses 0
STAT delete_hits 0
STAT incr_misses 0
STAT incr_hits 0
STAT decr_misses 0
STAT decr_hits 0
STAT cas_misses 0
STAT cas_hits 0
STAT cas_badval 0
STAT touch_hits 0
STAT touch_misses 0
STAT auth_cmds 0
STAT auth_errors 0
STAT bytes_read 7
STAT bytes_written 0
STAT limit_maxbytes 67108864
STAT accepting_conns 1
STAT listen_disabled_num 0
STAT time_in_listen_disabled_us 0
STAT threads 4
STAT conn_yields 0
STAT hash_power_level 16
STAT hash_bytes 524288
STAT hash_is_expanding 0
STAT slab_reassign_rescues 0
STAT slab_reassign_chunk_rescues 0
STAT slab_reassign_evictions_nomem 0
STAT slab_reassign_inline_reclaim 0
STAT slab_reassign_busy_items 0
STAT slab_reassign_busy_deletes 0
STAT slab_reassign_running 0
STAT slabs_moved 0
STAT lru_crawler_running 0
STAT lru_crawler_starts 765
STAT lru_maintainer_juggles 258
STAT malloc_fails 0
STAT log_worker_dropped 0
STAT log_worker_written 0
STAT log_watcher_skipped 0
STAT log_watcher_sent 0
STAT bytes 0
STAT curr_items 0
STAT total_items 0
STAT slab_global_page_pool 0
STAT expired_unfetched 0
STAT evicted_unfetched 0
STAT evicted_active 0
STAT evictions 0
STAT reclaimed 0
STAT crawler_reclaimed 0
STAT crawler_items_checked 0
STAT lrutail_reflocked 0
STAT moves_to_cold 0
STAT moves_to_warm 0
STAT moves_within_lru 0
STAT direct_reclaims 0
STAT lru_bumps_dropped 0
END
quit
通过非交互命令查看状态
[root@centos7 ~]# { echo -e "stats\nquit";sleep 1; } | telnet 127.0.0.1 11211利用nc查看状态
[root@centos7 ~]# nc 127.0.0.1 11211
状态
stats
退出
quit
比如我们只关注当前的连接数
[root@centos7 ~]# echo -e "stats\nquit" | nc 127.0.0.1 11211 | grep curr_connections
STAT curr_connections 1
查看当前的线程数
[root@centos7 ~]# echo -e "stats\nquit" | nc 127.0.0.1 11211 | grep threads
STAT threads 4
查看命中率
[root@centos7 ~]# echo -e "stats\nquit" | nc 127.0.0.1 11211 | grep get_hits
STAT get_hits 0
利用telnet写入数据
[root@centos7 ~]# telnet 127.0.0.1 11211
Trying 127.0.0.1...
Connected to 127.0.0.1.
Escape character is '^]'.
set key1 0 0 3
n53
STORED
写入命令,多输入几次
[root@centos7 ~]# echo -e "get key1\nquit" |nc 127.0.0.1 11211
VALUE key1 0 3
n53
END
^C
查看
[root@centos7 ~]# echo -e "stats\nquit" | nc 127.0.0.1 11211 |grep hits
STAT get_hits 25
STAT delete_hits 0
STAT incr_hits 0
STAT decr_hits 0
STAT cas_hits 0
STAT touch_hits 0
查看一个不存在的值
[root@centos7 ~]# echo -e "get key2\nquit" | nc 127.0.0.1 11211
END
[root@centos7 ~]# echo -e "get key2\nquit" | nc 127.0.0.1 11211
END
查看
[root@centos7 ~]# echo -e "stats\nquit" | nc 127.0.0.1 11211 |grep misses
STAT get_misses 2
STAT delete_misses 0
STAT incr_misses 0
STAT decr_misses 0
STAT cas_misses 0
STAT touch_misses 0
关注get_misses,curr_connections,get_hits
[root@centos7 ~]# echo -e "stats\nquit" | nc 127.0.0.1 11211 |grep get_misses | awk '{print $3}'
2
[root@centos7 ~]# echo -e "stats\nquit" | nc 127.0.0.1 11211 |grep curr_connections | awk '{print $3}'
1[root@centos7 ~]# echo -e "stats\nquit" | nc 127.0.0.1 11211 |grep get_hits | awk '{print $3}'
25添加一个监控memcached的脚步
vim /etc/zabbix/zabbix_agentd.d/monitor_memcached.sh
#/bin/bash
PORT=$1
ITEM=$2
echo -e "stats\nquit" | nc 127.0.0.1 $PORT |grep $ITEM | awk '{print $3}'
添加执行权限
[root@centos7 ~]# chmod +x /etc/zabbix/zabbix_agentd.d/monitor_memcached.sh
测试脚本,$1是端口,$2是取值的参数
[root@centos7 ~]# bash /etc/zabbix/zabbix_agentd.d/monitor_memcached.sh 11211 curr_connections
1
准备监控的配置文件
[root@centos7 ~]# vim /etc/zabbix/zabbix_agentd.d/memcached.conf
UserParameter=memcached_state[*],/etc/zabbix/zabbix_agentd.d/monitor_memcached.sh $1 $2
重启zabbix-agent
[root@centos7 ~]# systemctl restart zabbix-agent.service
再zabbix-server上面取值,测试是否能取出值
[root@centos7 ~]# zabbix_get -s 10.0.0.11 -k memcached_state[11211,get_hits]
0
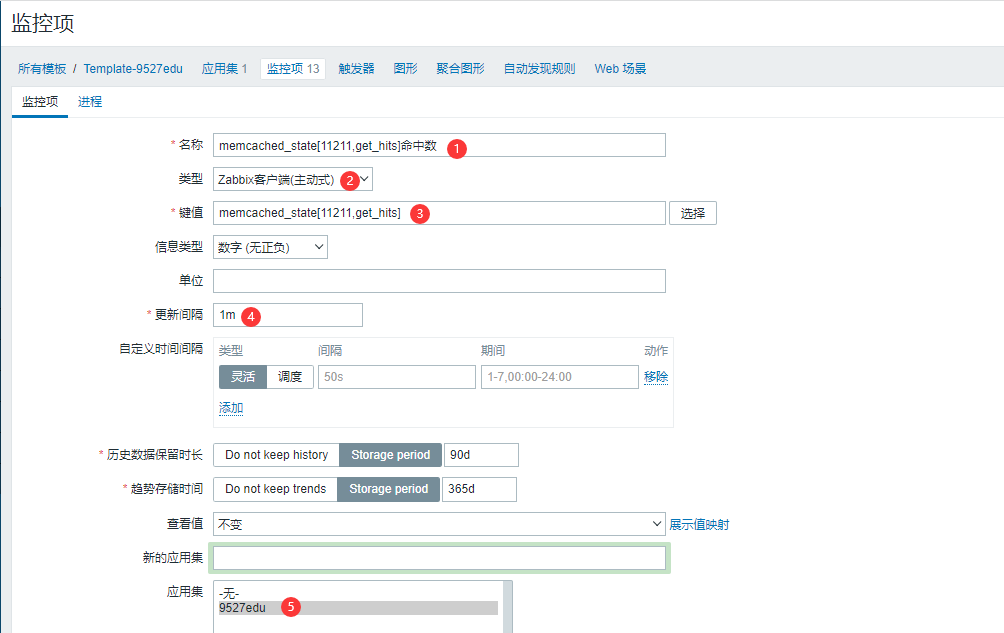
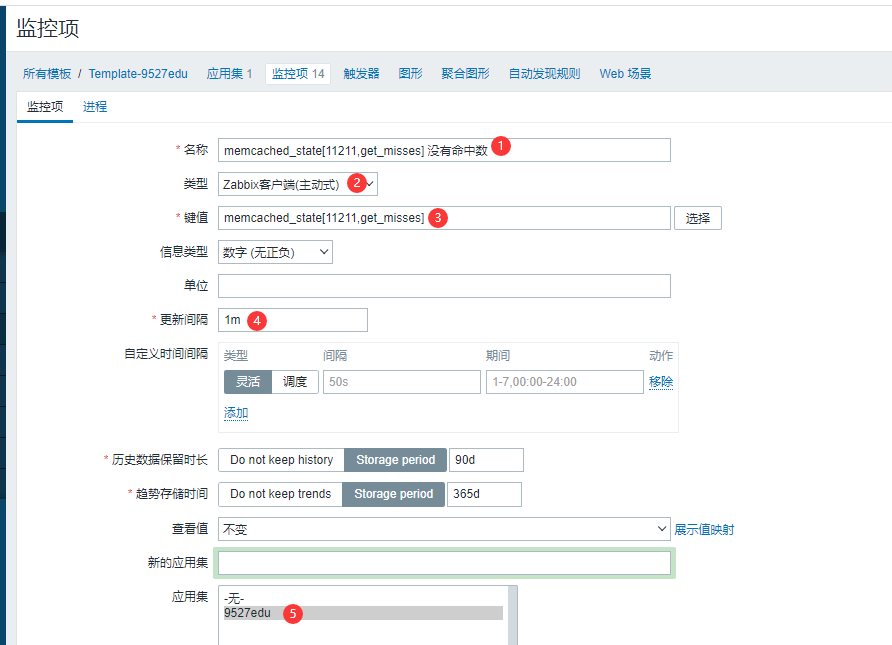
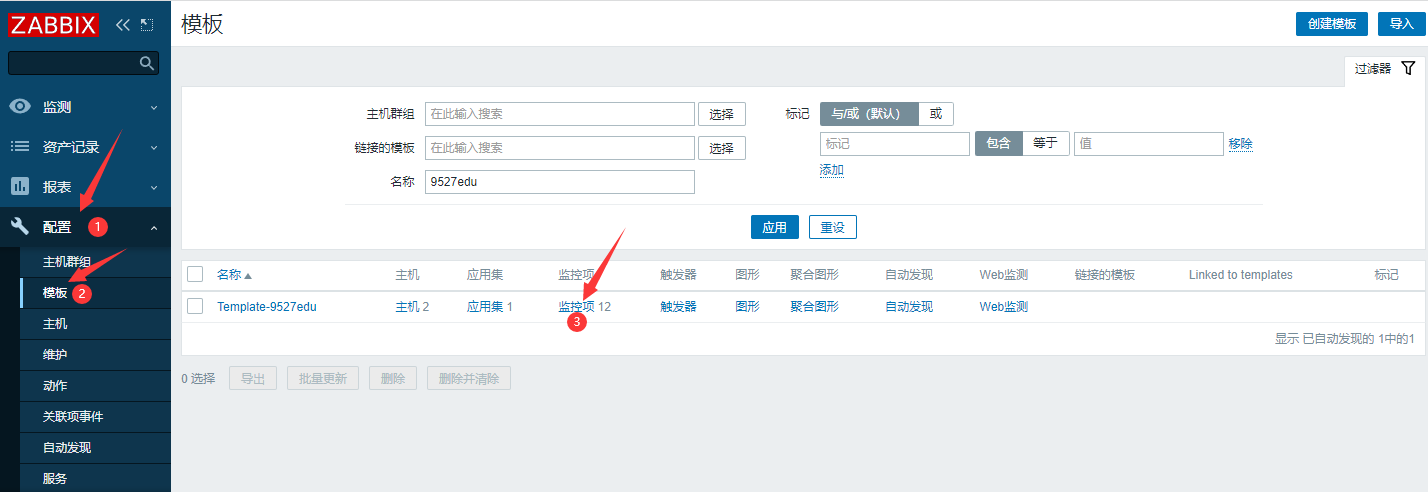
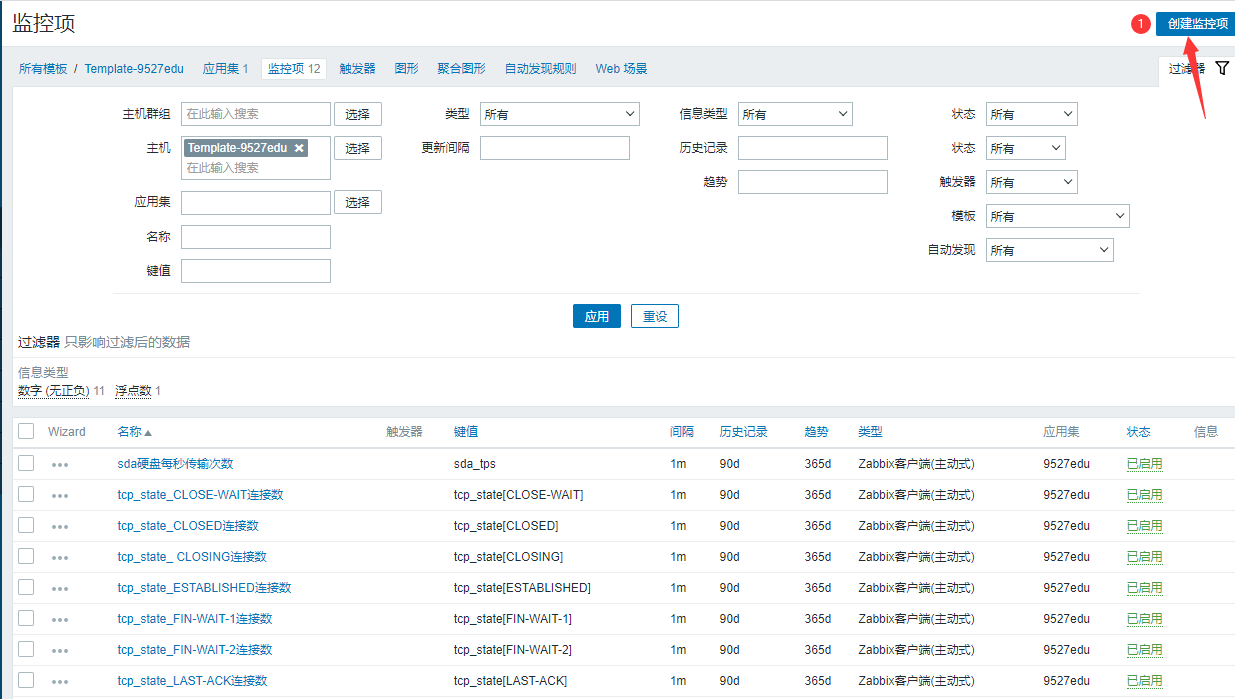
添加memcached监控项,添加到9527edu这个模板里面
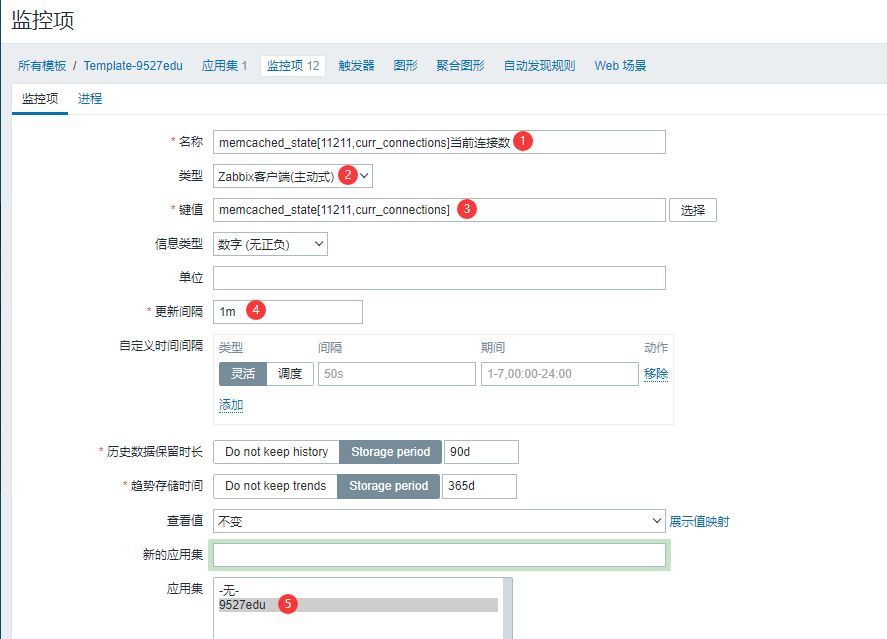

重复刚才的过程把get_misses,get_hits添加到监控项